Last Updated on November 3, 2022 by ellen
Have you thought about hanging an Easter bunny wreath on your front door? Check out this Easter bunny wreath DIY and get started.
Posts may be sponsored. This post contains affiliate links, which means I will make a commission at no extra cost to you should you click through and make a purchase. As an Amazon Associate I earn from qualifying purchases.
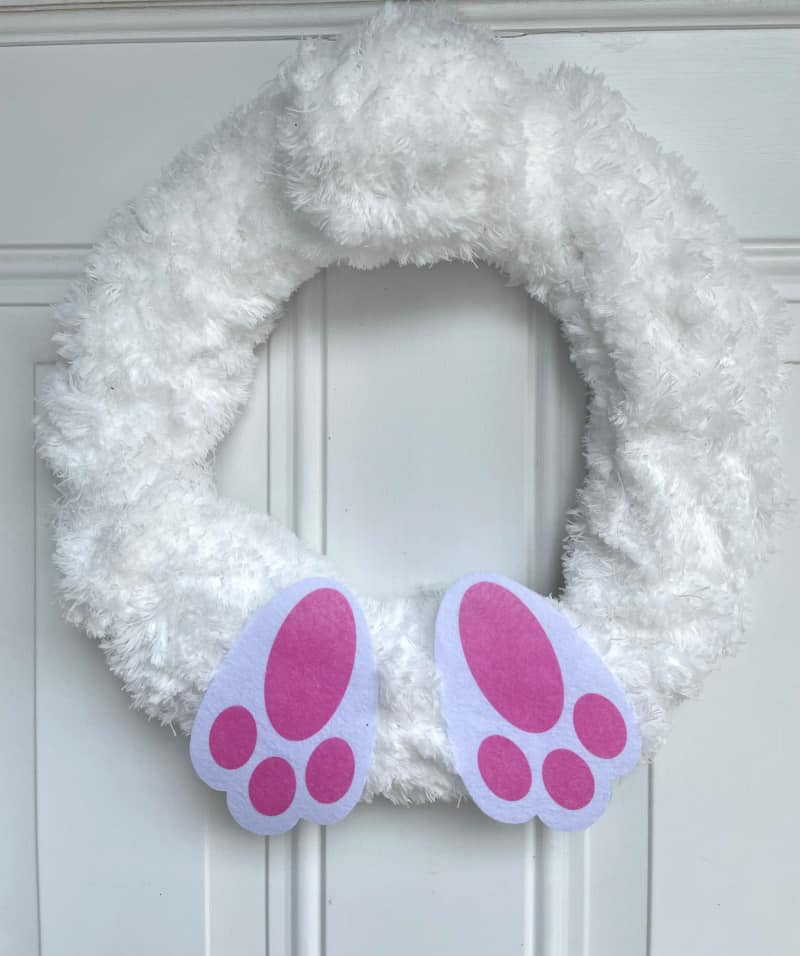
Table of Contents
Easter Bunny Wreath DIY
This adorable Easter bunny wreath will look so cute on your front door. All you need are a few simple craft supplies and your hot glue gun to get started.
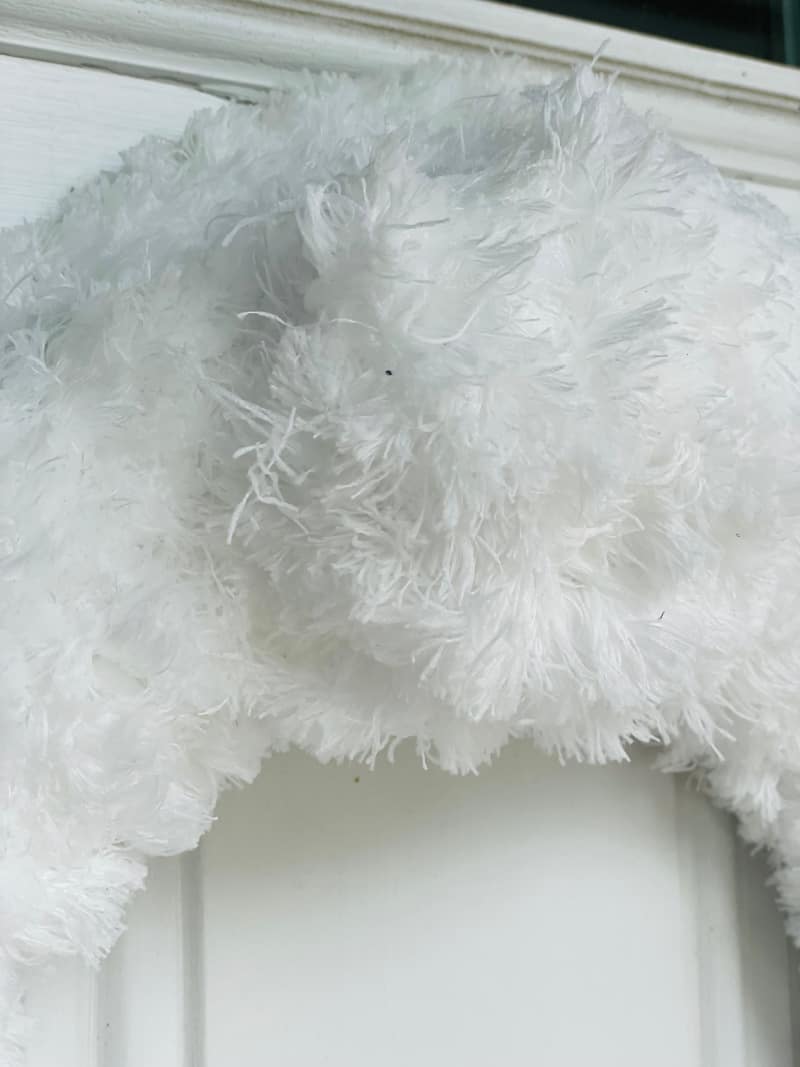
Hang this spring wreath on your indoor door or in a protected area so you can enjoy it all season long. Remember that the wreath is not weatherproof so you will want to keep it out of the rain and wind.
This is one of the cutest DIY Easter Wreaths I have seen.
Save on over 60,000 brand name craft supplies at www.CreateForLess.com
Tools and Supplies
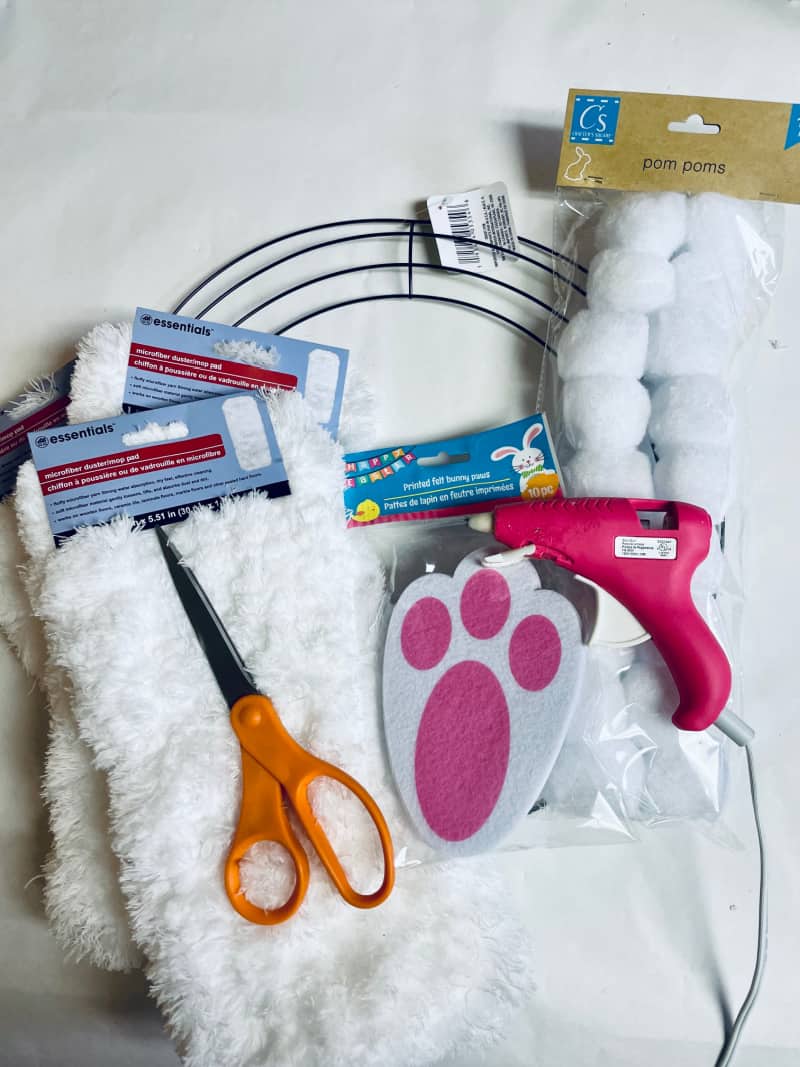
The supplies for this Easter Bunny Wreath were purchased at Dollar Tree. But, you can probably find many of them at other stores. Or, check out Amazon or Hobby Lobby.
- 14-inch wire wreath form or wreath frame
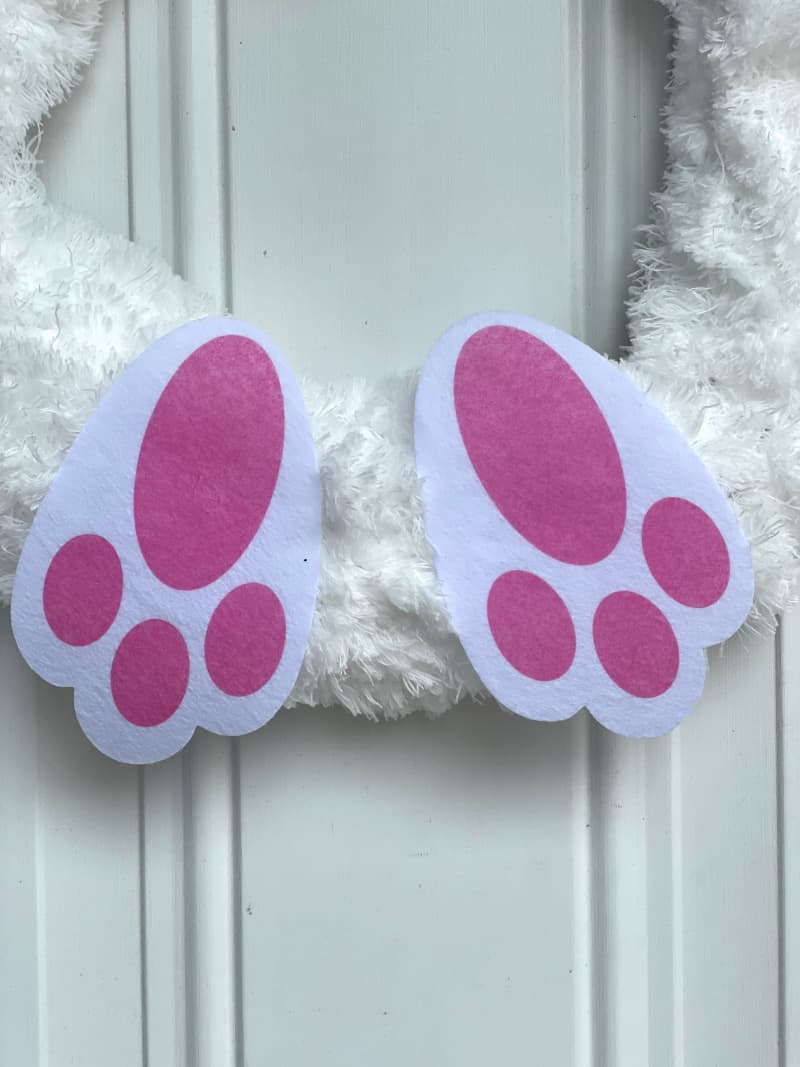
- Felt Bunny Feet
- Scissors
- Hot Glue Gun & Glue sticks
- White large pom poms
- Microfiber duster cloths (white)
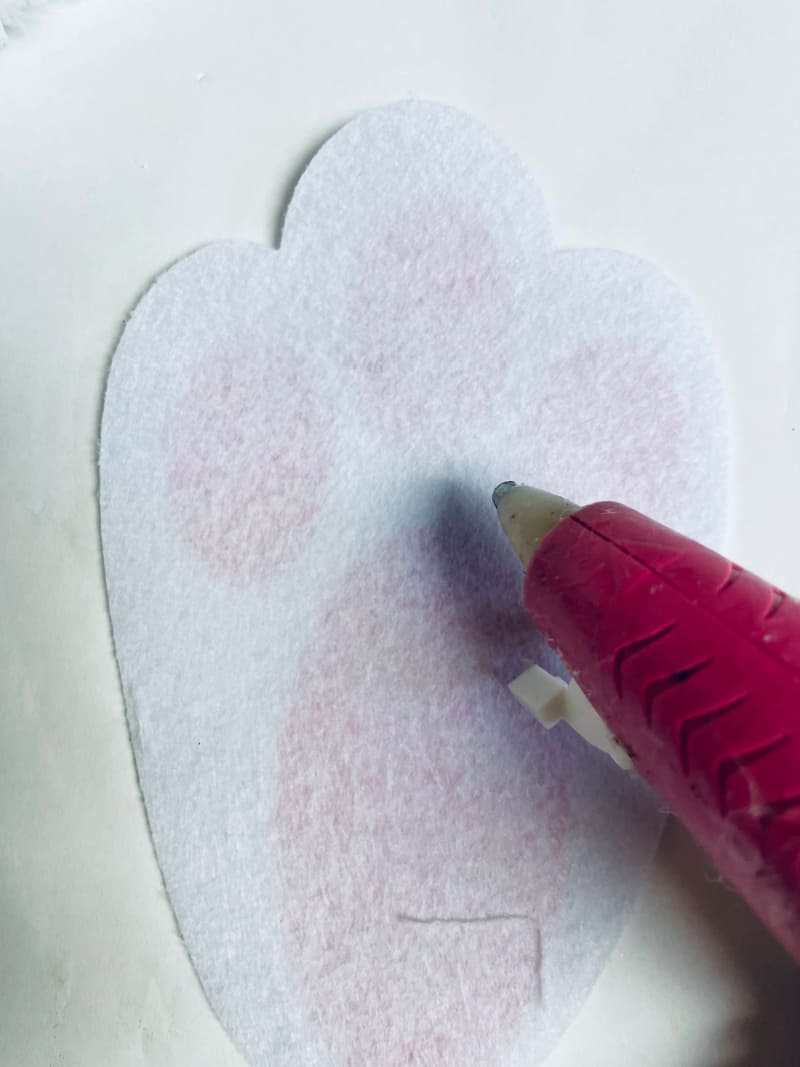
If you cannot find the felt bunny feet, you can make your own with white and pink pieces of felt.
You can use other wreath forms. Just make sure that you have enough cloths to go all the way around the wreath forms.
How do you make this adorable bunny rabbit wreath?
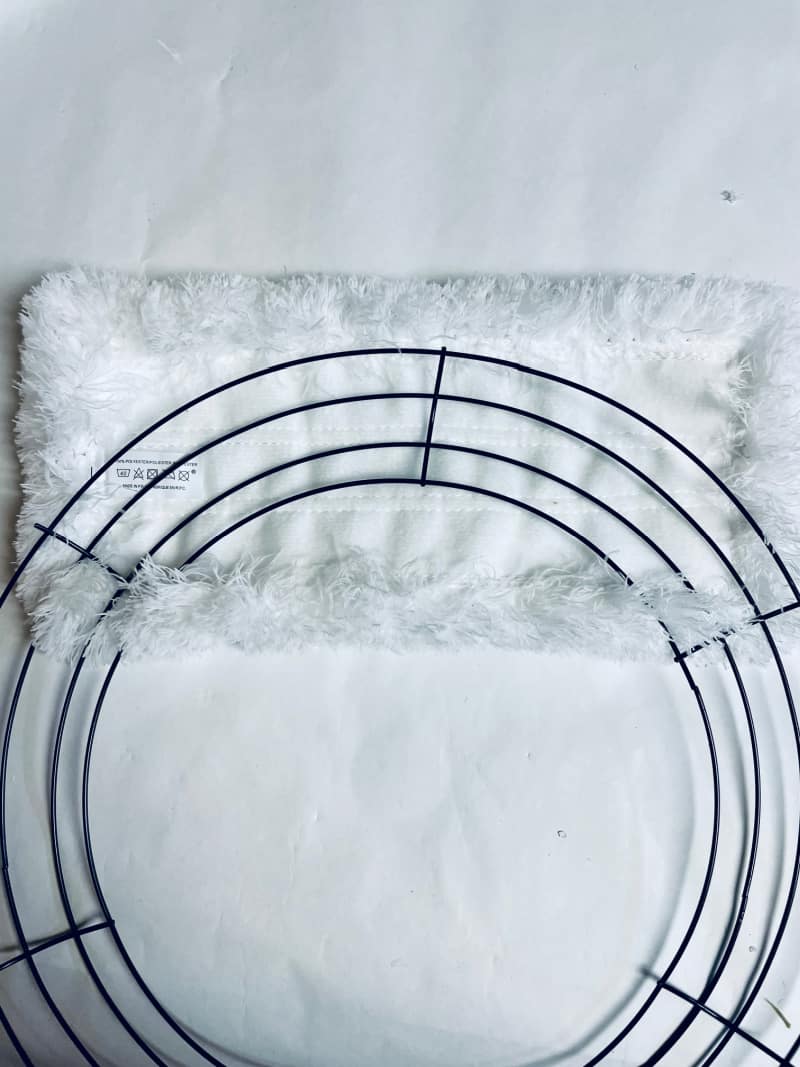
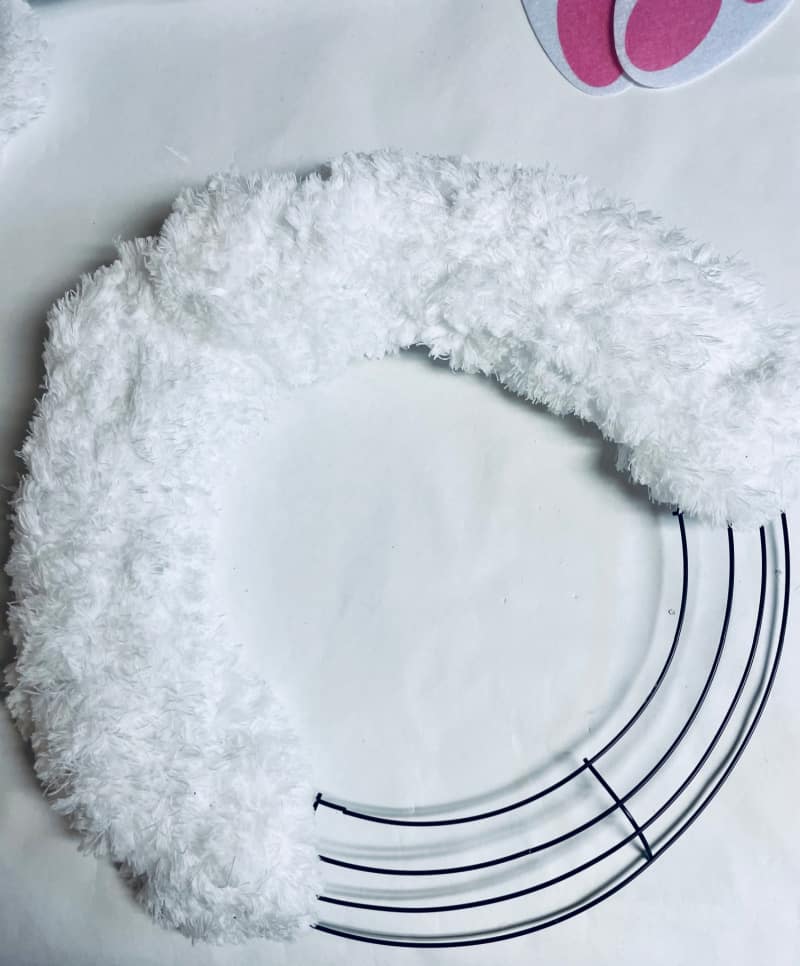
- Start by putting the wreath so the flat side is facing you and place the microfiber cloth underneath.
- Line the wreath form section with hot glue and fold the microfiber cloth over where you added the hot glue. Repeat this with 2 other microfiber cloths around the wreath.
- In sections, you will need to pull the microfiber cloth to have it go around the round wreath shape.
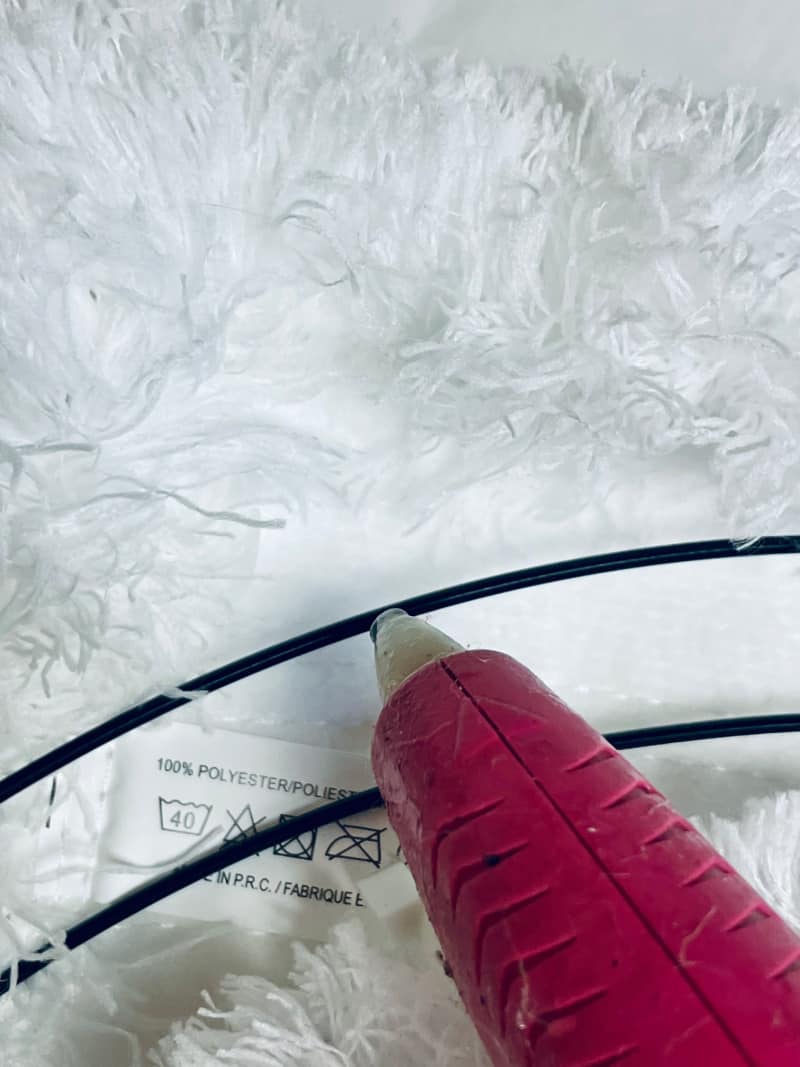
- Continue all the way around the wreath.
- Next, add some hot glue to the backside of the felt feet and then press firmly onto the bottom section of the wreath.
- Next hot glue 4 large pom poms in a circle shape on the top section of the wreath. This is the Easter Bunny’s butt.
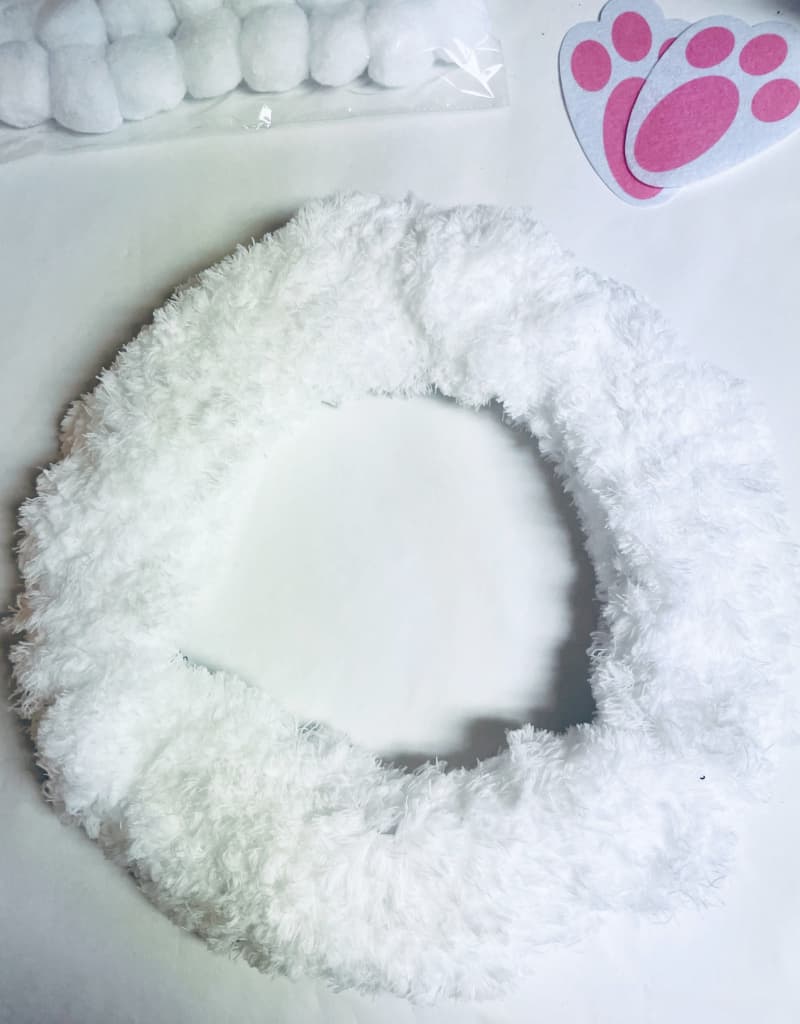
- Take the last microfiber cloth and cut a section that is about 1/3 of the entire cloth. This will make the bunny tail.
- Trim the edges to make more of a circle shape. Add a good amount of hot glue to the backside of the microfiber cloth and press it firmly over the pom-poms to form the bunny tail shape.
- Wait till the glue cools and hang the Easter Bunny Wreath up.
Ways to personalize your Easter Bunny Wreath DIY
There are lots of ways to make this DIY Easter wreath more uniquely yours.
- Add faux flowers
- Paint a wood plaque with Hoppy Easter
- Add bunny ears
- Add a bow

How do you make a bunny bottom for a wreath?
If you want to use a different wreath form and simply add a bunny bottom, you can.
All you need is a piece of felt, a hot glue gun, and some wire.
- Cut a piece of white felt that is about 14 inches wide and 22 inches long. This will give you enough to make the bunny bottom and the tail.
- Fold the felt in half so the short ends meet. Sew a seam down the side and across the bottom to make a tube.
- Cut a 2-inch strip of felt for the tail. Hot glue the strip to the back of the bunny bottom.
- Now it’s time to add the bunny bottom to your wreath.
- Start by adding some hot glue to the backside of the felt and then pressing it firmly onto the wreath. Be sure to press it in place so it doesn’t move.
- Next, add a good amount of hot glue to the top edge of the bunny bottom and then attach the wire. Use pliers to twist the wire around to make a hanger.
- Your bunny bottom is now ready to hang on your Easter wreath.
More Easter ideas
If you enjoyed this Easter Bunny Wreath DIY, you might like these ideas.
- Paper Mache Easter Eggs
- DIY Easter Flower Baskets
- Mess-Free Easter Eggs
- Easter Color by Number Worksheets
- Easter Gnome Coloring Pages
- Hanging wreaths on windows
Easter Bunny Wreath DIY
Have you thought about hanging an Easter bunny wreath on your front door? Check out this Easter bunny wreath DIY and get started.
Materials
- 14-inch wire wreath form or wreath frame
- Felt Bunny Feet
- Scissors
- Hot Glue Gun & Glue sticks
- White large pom poms
- Microfiber duster cloths (white)
Tools
- scissors
- hot glue gun
Instructions
- Start by putting the wreath on its opposite side facing you and place the microfiber cloth underneath. Line the wreath form section with hot glue and fold the microfiber cloth over where you added the hot glue.
- Repeat this with 2 other microfiber cloths around the wreath. In sections, you will need to pull the microfiber cloth to have it go around the round wreath shape.
- Next, add some hot glue to the backside of the felt feet and then press firmly onto the bottom section of the wreath.
- Next hot glue 4 large pom poms in a circle shape on the top section of the wreath.
- Take the last microfiber cloth and cut a section that is about 1/3 of the entire cloth. This will make the bunny tail.
- I trimmed the edges to make more of a circle shape. Add a good amount of hot glue to the backside of the microfiber cloth and press it firmly over the pom-poms to form the bunny tail shape

Welcome to In Our Spare Time, your go-to source for family-friendly fun. Discover honest reviews, entertaining articles, and fresh ideas for making the most of your free time with younger kids. From games, movies, and books to family activities and seasonal adventures, we help parents find simple ways to create memorable moments together.