Last Updated on June 10, 2023 by ellen
Looking for beach vibes decor? Check out these tips to create a beachy bedroom, including this DIY beach vibes sign you can print and frame.
Posts may be sponsored. This post contains affiliate links, which means I will make a commission at no extra cost to you should you click through and make a purchase. As an Amazon Associate I earn from qualifying purchases.
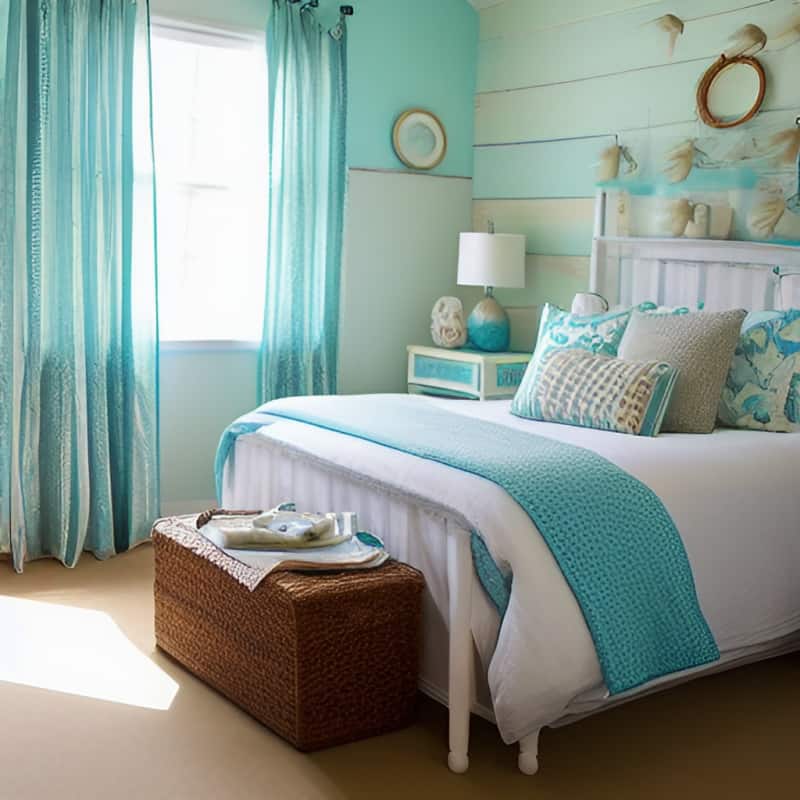
Table of Contents
Beach Vibes Decor
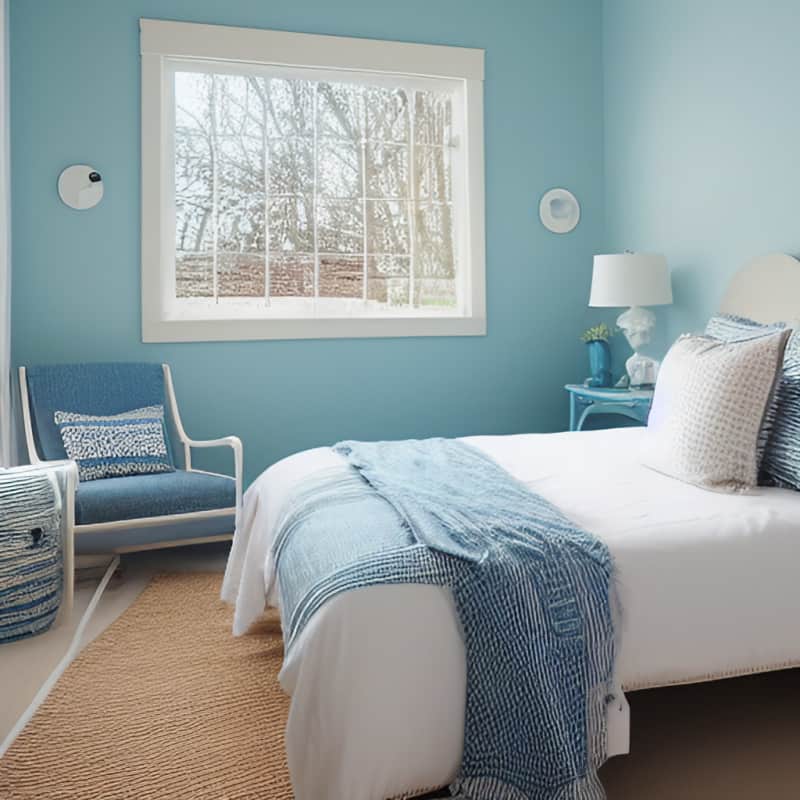
If you enjoyed spending the summer at the beach and want to bring some ocean fun back, keep reading for some simple ways to create a pretty summer beach-theme bedroom.
The beach means sun, sand, seashells, and driftwood. And you can easily decorate your house with these summer elements.
What are beach vibes?
Beach vibes are the perfect way to describe the cool, relaxed feeling you get near the ocean.
Creating a beach vibe in your home is easy if you use a few key elements.
The first step is to choose a color scheme. For a beach-vibe bedroom, stick with light and airy paint colors such as white, blue, green, and pink.
Then, add beach-themed decor, such as seashells, starfish, coral, and driftwood.
Finally, don’t forget to bring some greenery with plants or flowers.
Now that you know the basics of creating a beach vibe in your home let’s take a look at some specific tips for decorating a beach bedroom.
Use Light and Airy Colors
As we mentioned, one of the key elements of a beach vibe bedroom is using light and airy colors.
White is an obvious paint choice for walls in a beach bedroom. But you can also use pale blues, green, or pink paint.
These colors will help to create a feeling of airiness and spaciousness in your room. They’ll also remind you of the sky, water, and sand at the beach.
My favorite summer paint colors are:
Add Beach-Themed Decor
Add some shells, starfish, coral, and driftwood to your decor to capture the feeling of being at the beach. Display them on the mantle in the living room or on your dresser.
You can find these items at your local craft store, on etsy, or online.
If you want to get creative, you can make your driftwood art by finding some pieces of driftwood and arranging them into a pretty pattern on your wall.
My favorite beach vibes home decor items are:
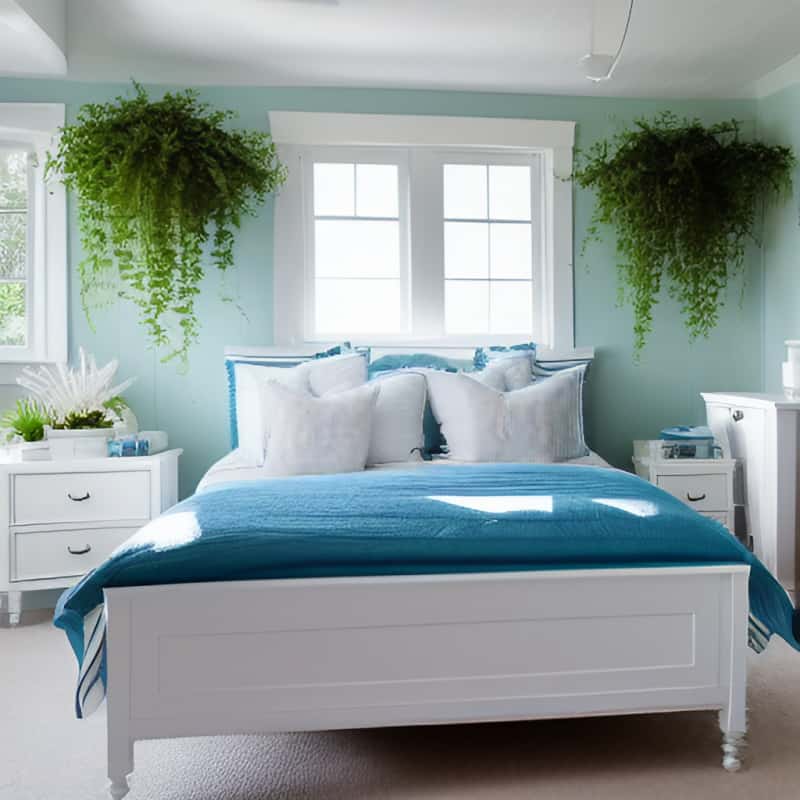
Bring in Some Greenery
No beach-themed bedroom would be complete without some greenery.
Plants are a great way to add color and life to your room.
And they’ll help to purify the air, too.
You can always opt for fake plants if you don’t have a green thumb. But I think natural plants are always better.
Tips for decorating with coastal decor
- Pair beachy colors with natural elements like dried grasses and polished pebbles.
- Add a small bowl of sea glass for color and texture.
- Mix and match different patterns and textures to create an interesting and inviting space.
- Add some personal touches with photos and art that reflect your own beach lifestyle.
- Turn your bedroom into a true oasis by filling it with relaxing scents like lavender or chamomile.

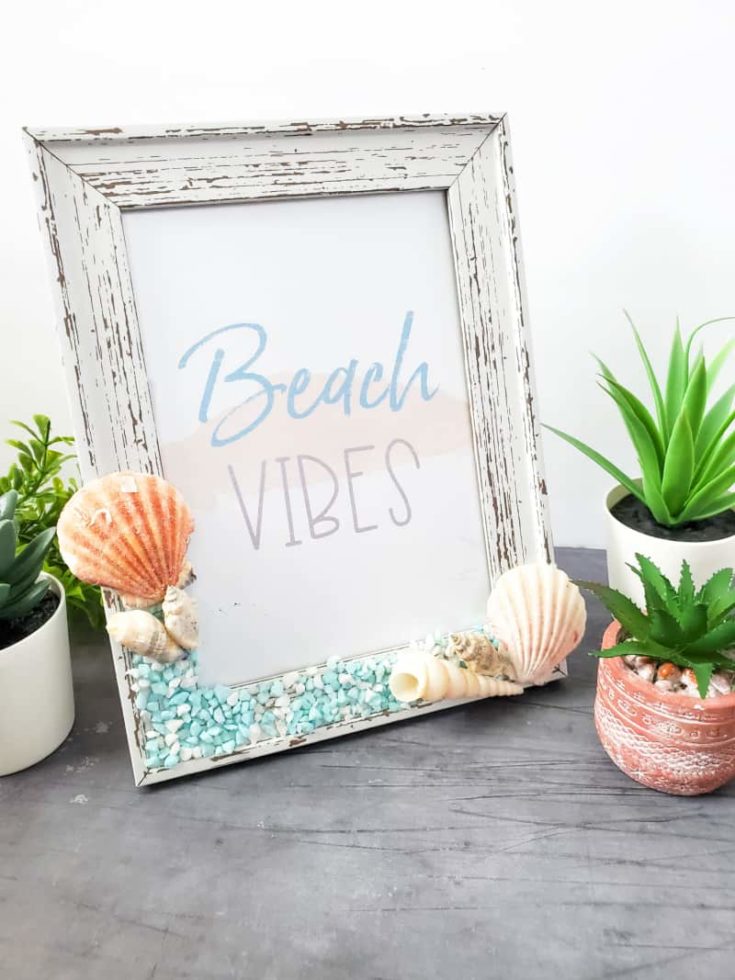
DIY Beach Vibes Sign
This is a framed sign you can place on your dresser or hang on your walls. If you want a wooden sign, you can print out the PDF and use it as a stencil to paint your sign.
You can use it on a round sign or any style wooden sign.
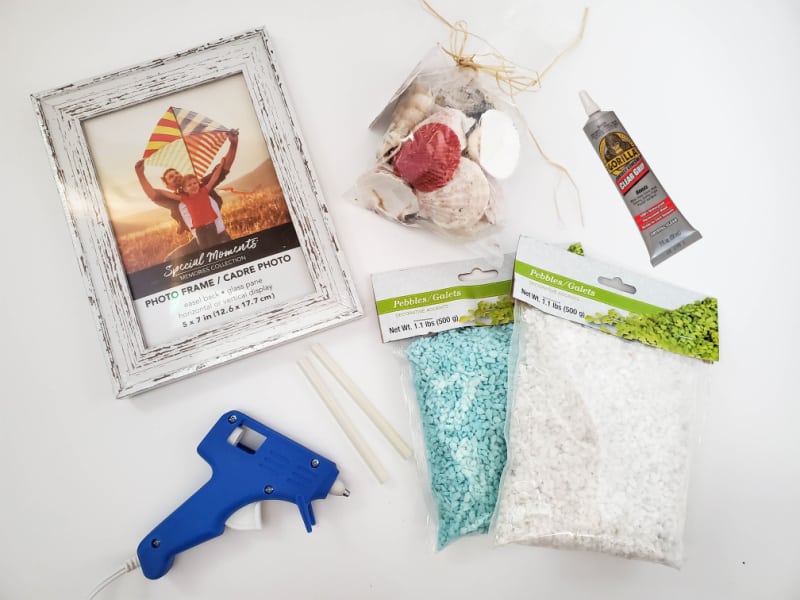
Materials you need
You can find most of these at Dollar Tree. Or, check out Amazon.
- White distressed photo frame, size 5×7
- Pebbles – turquoise and white (similar to these)
- Seashells
- Hot glue gun
- Hot glue
- Gorilla glue
- Printable sign
How to create a beach vibes sign
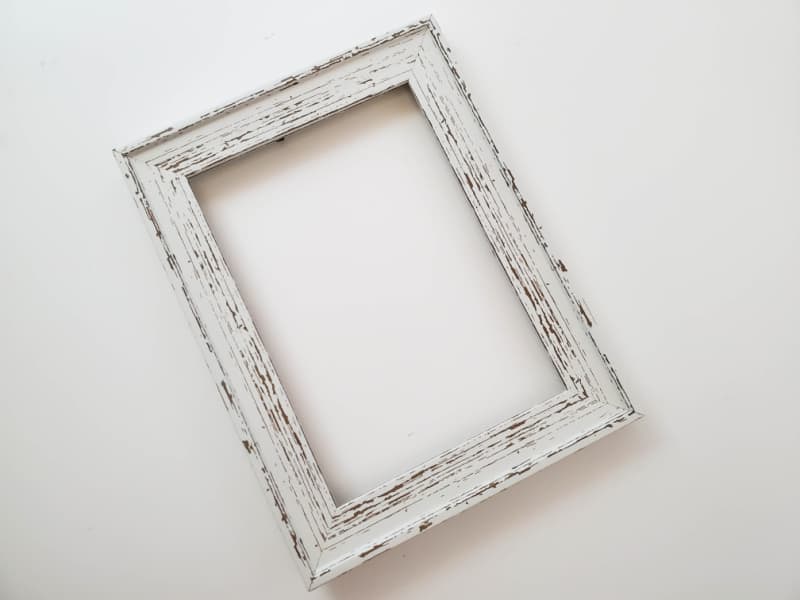
- Remove the back and the glass from the photo frame before working.
- Apply a small amount of Gorilla glue to the front bottom of the frame.
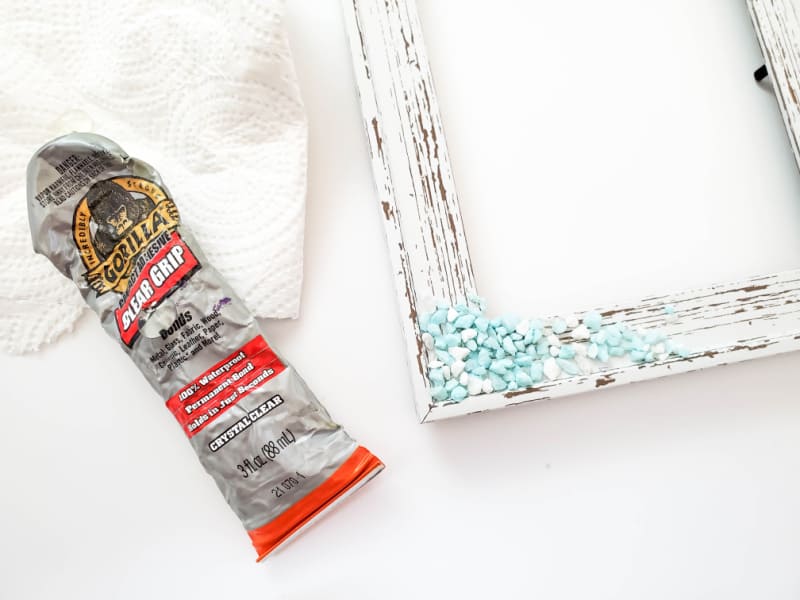
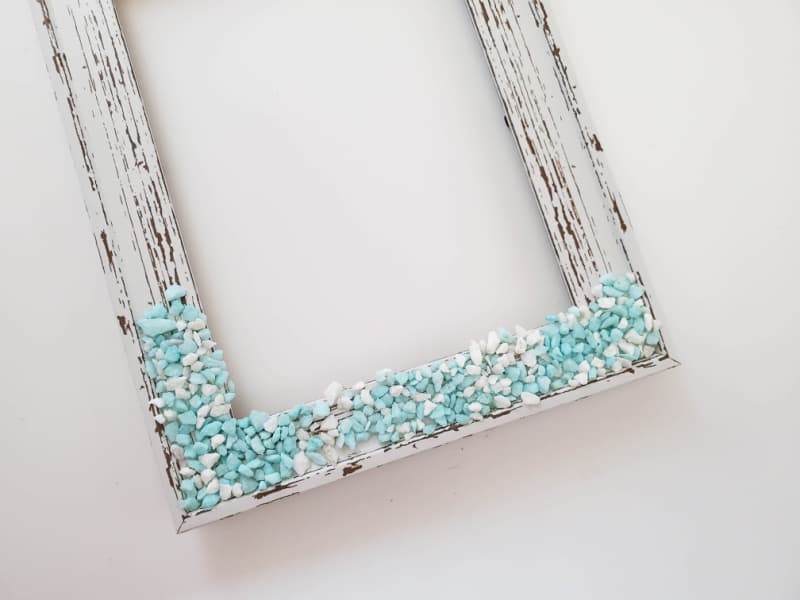
- Immediately sprinkle some blue pebbles onto the glued area, then sprinkle some white pebbles onto the glued area. Lightly press down. Continue this step until you have covered the bottom portion of the frame and about two extra inches up the left side of the frame.
- Apply a small amount of hot glue to the bottom edges of a seashell, then glue to the bottom right corner of the frame.
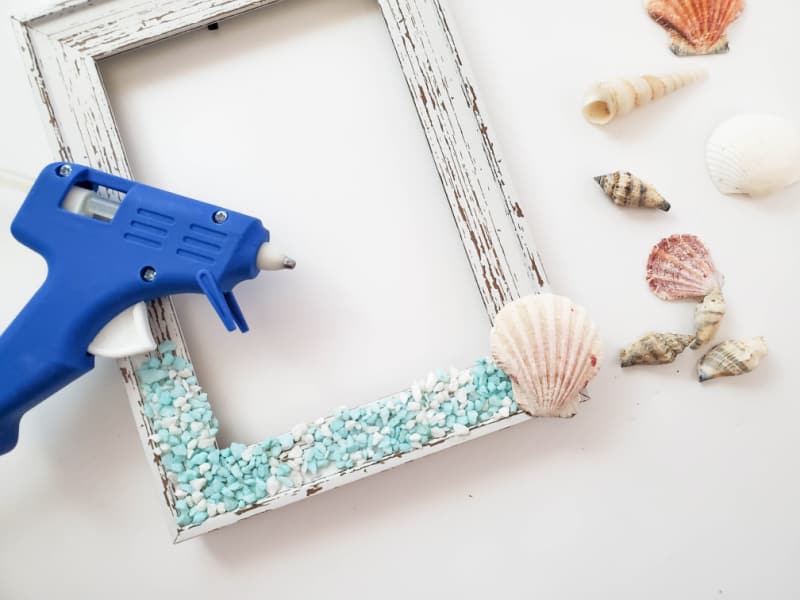
- Repeat the above step to add a couple more shells next to the first one. You can get creative with the design here if you’d prefer to add more shells or different shapes and sizes.
- Apply a small amount of glue to another shell, and adhere it just above where the pebbles end on the left side of the frame. Then add a couple more shells underneath.
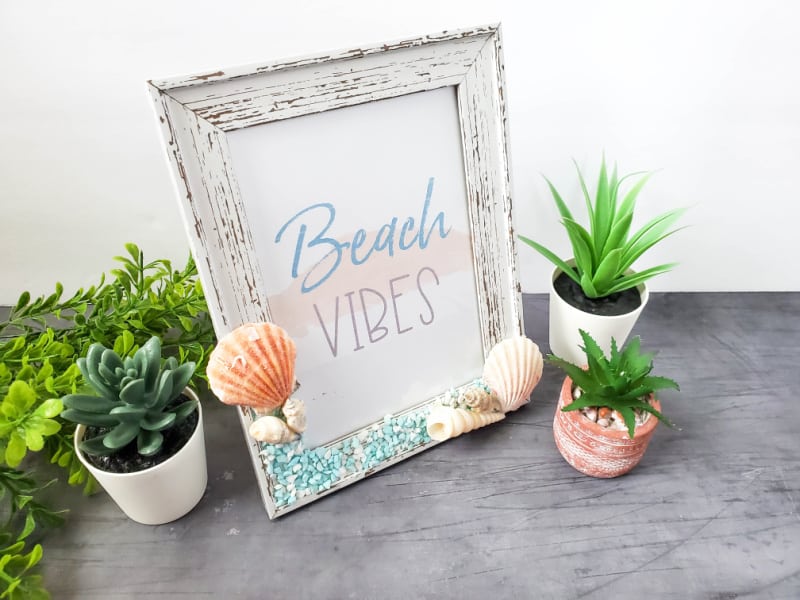
- Print the artwork if you’d like, trim it to size, and put it in the frame.
These are just a few tips for creating a beach-themed bedroom. So get creative and have fun!
Beach Vibes Photo Frame
Looking for beach vibes decor? Check out these tips to create a beachy bedroom, including this DIY beach vibes sign you can print and frame.
Materials
- White distressed photo frame, size 5×7
- Pebbles – turquoise and white (similar to these)
- Seashells
- Hot glue gun
- Hot glue
- Gorilla glue
Tools
- hot glue gun
Instructions
- Remove the back and the glass from the photo frame before you start working.
- Apply a small amount of Gorilla glue to the front bottom of the frame.
- Immediately sprinkle some blue pebbles onto the glued area, then sprinkle some white pebbles onto the glued area. Lightly press down. Continue this step until you have covered the bottom portion of the frame, and about 2 extra inches up the left side of the frame.
- Apply a small amount of hot glue to the bottom edges of a seashell, then glue to the right bottom corner of the frame.
- Repeat the above step to add a couple of more shells next to the first one. You can get creative with the design here if you’d prefer to add more shells, or different shapes and sizes.
- Apply a small amount of glue to another shell, and adhere it just above where the pebbles end on the left side of the frame. Then add a couple more shells underneath.
- Print the artwork if you’d like, then trim to size, and put in the frame.

Welcome to In Our Spare Time, your go-to source for family-friendly fun. Discover honest reviews, entertaining articles, and fresh ideas for making the most of your free time with younger kids. From games, movies, and books to family activities and seasonal adventures, we help parents find simple ways to create memorable moments together.