Last Updated on November 23, 2023 by ellen
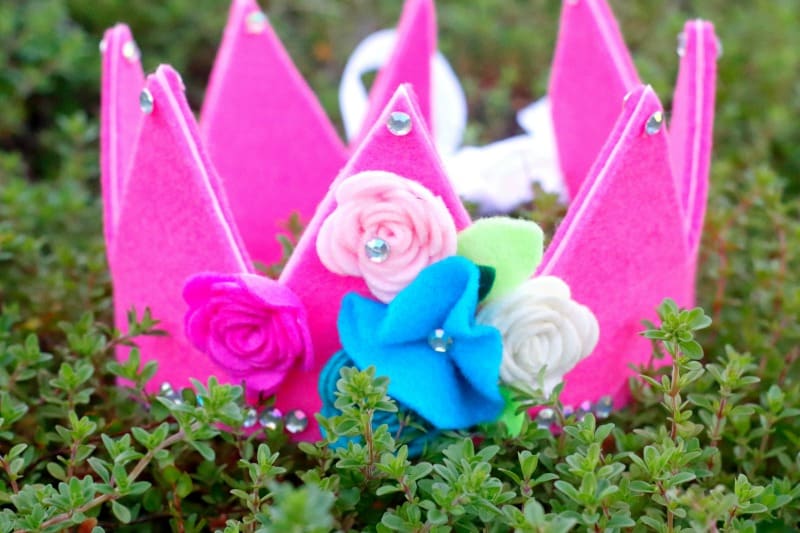
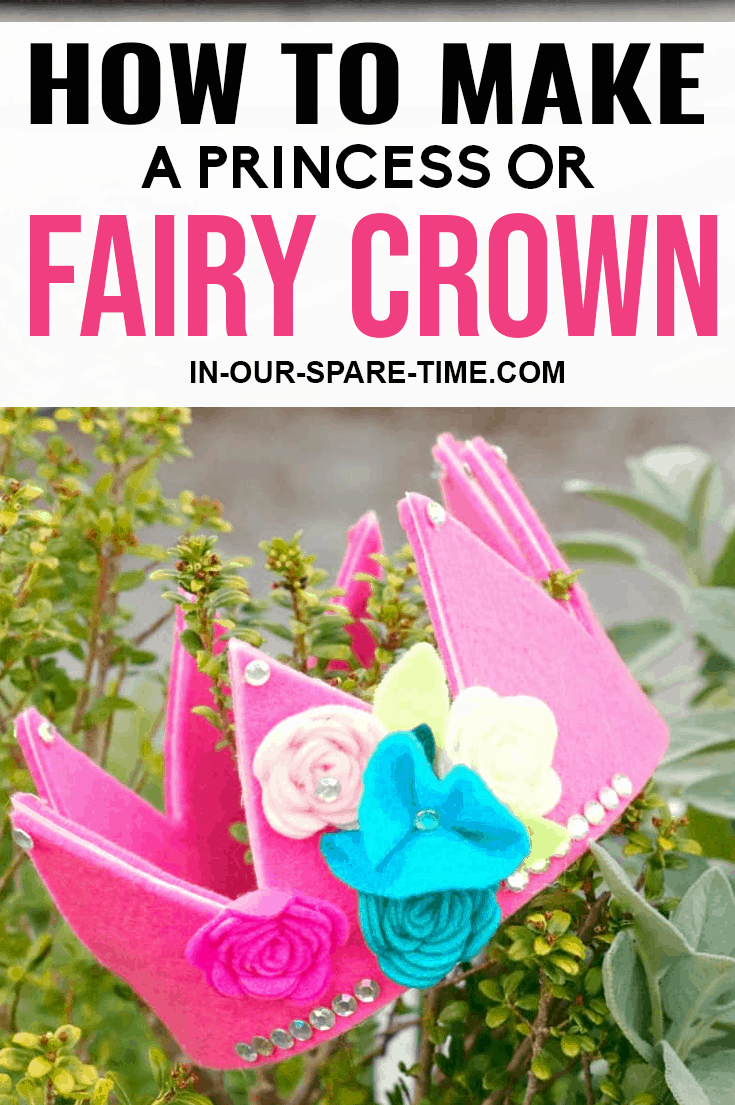
You can use this free felt crown template to make a princess or fairy crown. Or, it works just as well for a birthday crown for a child.
Posts may be sponsored. This post contains affiliate links, which means I will make a commission at no extra cost to you should you click through and make a purchase. As an Amazon Associate I earn from qualifying purchases.
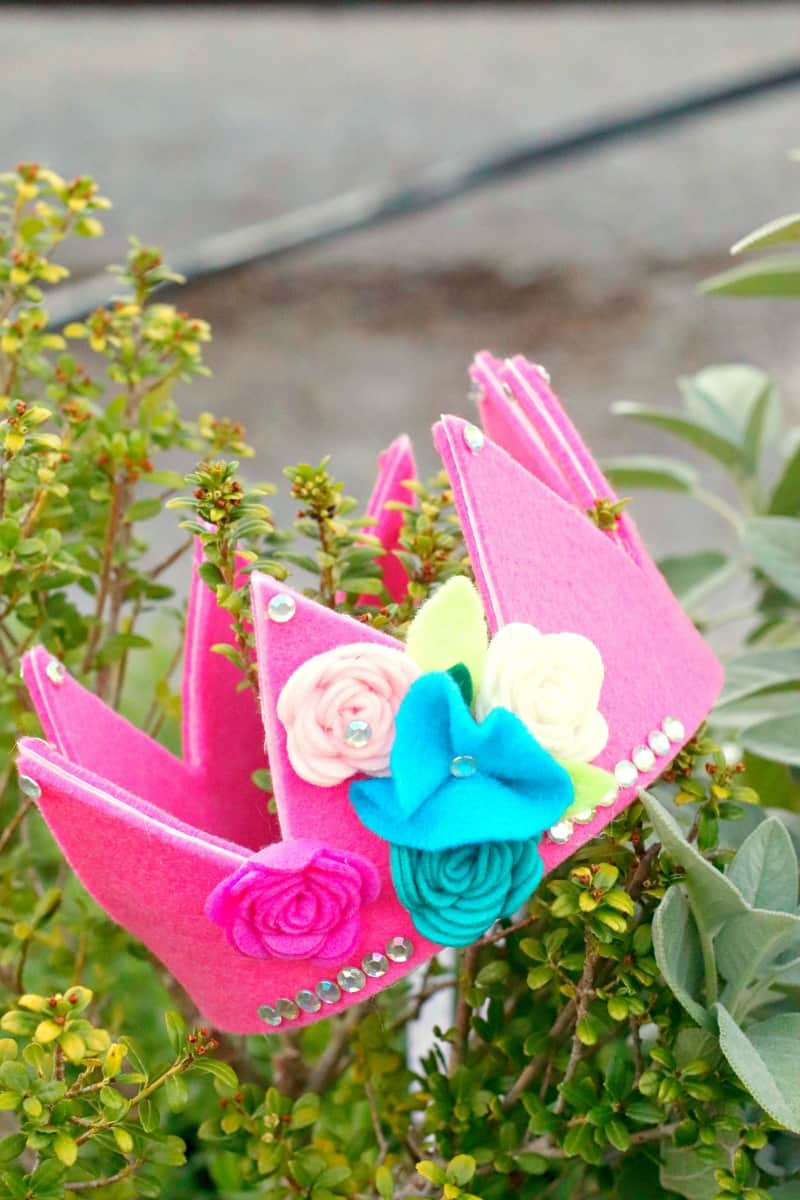
Table of Contents
Felt Crown Template
No matter what type of felt crown you want to make, this free template is just what you need to get started. You can create it as is for a princess or fairy crown. Or use the template without the flowers and make a birthday crown.
You can easily make a prince crown for a boy by using blue felt and no flowers. Or, why not make a crown for the nativity. Two buttons will turn it into a crown for Where the Wild Things Are. The possibilities are endless.
If your child loves fairies, you might want to try this kids fairy craft and make a DIY fairy house. Or, you can make this bird craft with a paper plate. Learn more about the Pukeko bird!
So, for those of you that don’t like sewing, you’ll be glad to know that this felt crown template creates a crown with no sewing required. Have I mentioned that I don’t like to sew? You can make a royal felt crown with a hot glue gun.
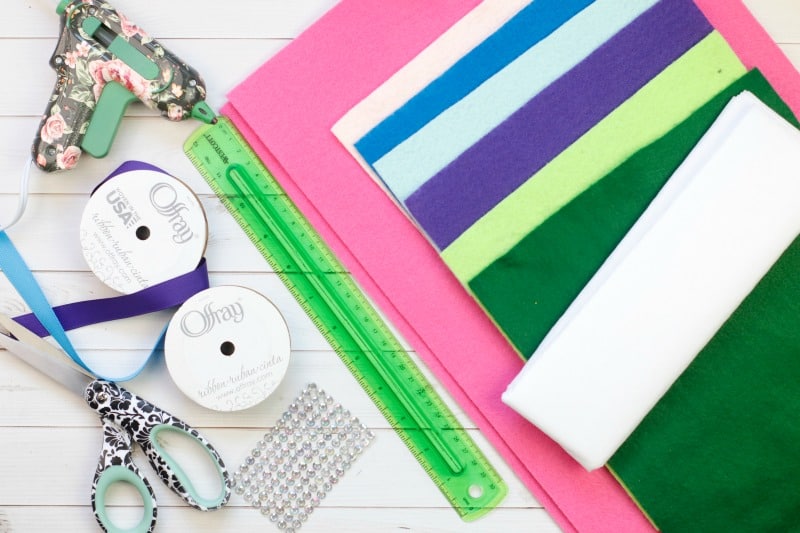
Materials List
- 1 felt crown template (Download here)
- 2 pieces of felt at least 28†long
- Multi-pack of craft felt to make your own flowers
- Stick on felt flowers
- Stick on rhinestones
- Medium-heavy weight fusible interfacing
- Glue gun and glue sticks
- Scissors
- Ribbon
- Ruler
- Wonder sewing clips or pins
Easy directions
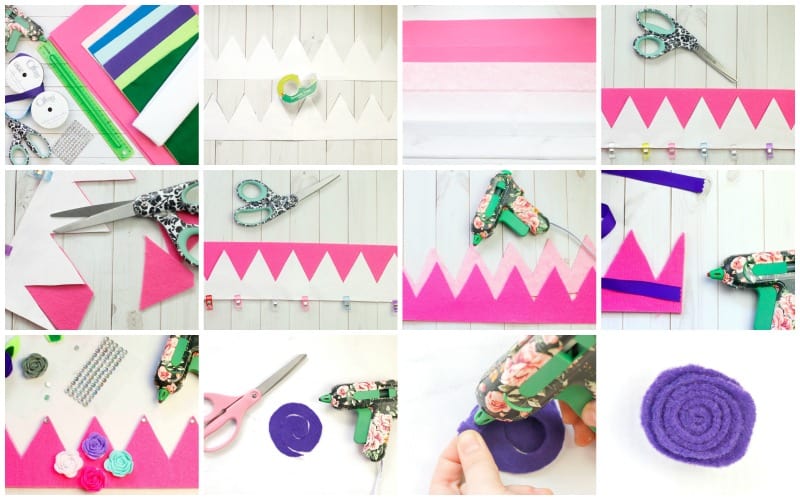
- Print 2 copies of your felt crown template and tape them together. Measure around your child’s head and subtract 1â€. This is the length you want the template for your crown. Cut your template to the size you need.
- Cut your two pieces of felt and two pieces of interfacing to the height and width of your finished template size. Iron the interfacing onto your felt.
- Lay one template onto one piece of felt, felt side up, and clip or pin into place. And cut. Now flip the felt crown template to the other side and place it on the other piece of felt, felt side up, and clip or pin into place. And cut.
- Using your hot glue gun, line up your two felt crown pieces, interfacing sides together, and secure together with glue. Leave a small opening in the middle on either side for the ribbon.
- Cut two lengths of ribbon for the ties. The length will depend on how long you and your child would like it to be. Glue the ribbon on the sides of the crown, in between the layers, where you left the small opening. Be sure you close the opening and the ribbon is nice and secure, so it does not pull out when tied.
- Using a small glass as a guide, draw a circle on your felt, and cut with your craft scissors. Pick up the felt and pinch from behind with your fingers.
- Using your glue gun, put a small drop of glue in the middle of the felt and hold for a few seconds. Using your glue gun, glue a small rhinestone in the middle.
- Finally, using your glue gun, decorate your felt fairy crown!
Get the Felt Crown Template
Related reading
Finally, if you enjoyed this felt crown template, you might want to check out a few of these fairy princess posts.
- Disney Princess Felt Kit
- 100 Fairytale Princesses to Design & Create
- Queen Esther Puppets
- Adventures of Ayuma
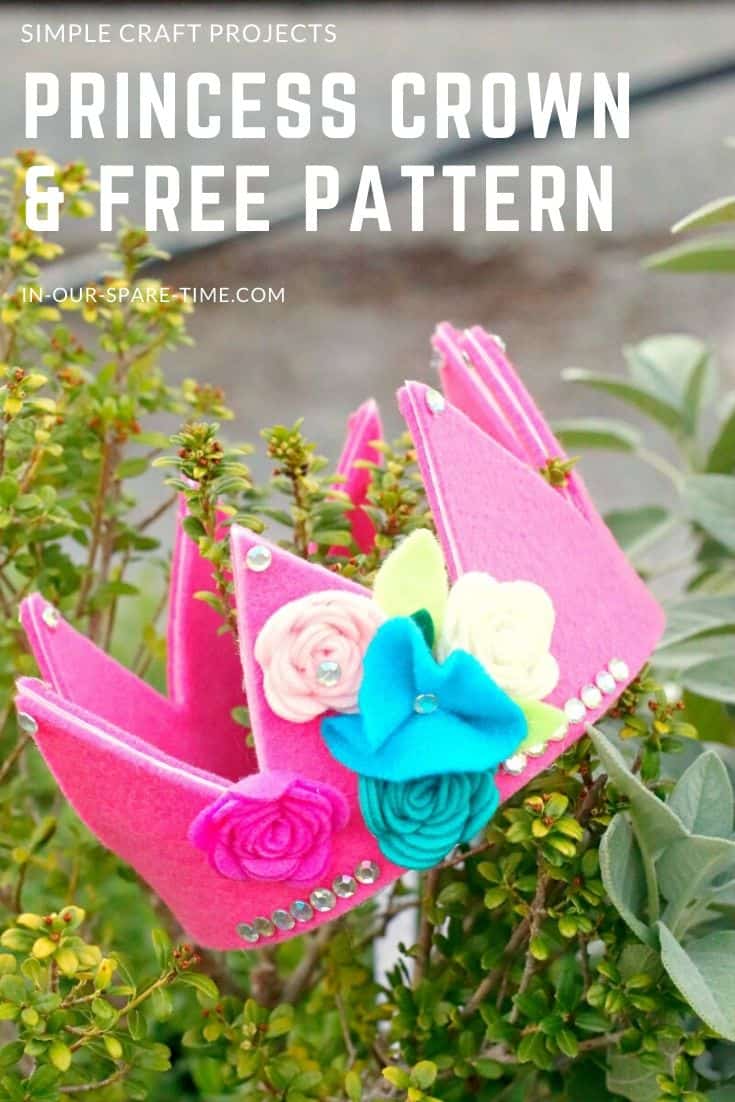
Felt Crown Template for a Princess or Fairy
Free felt crown template to make a princess or fairy crown.
Materials
- 1 felt crown template (Download here)
- 2 pieces of felt at least 28” long
- Multi-pack of craft felt to make your own flowers
- Stick on felt flowers
- Stick on rhinestones
- Medium-heavy weight fusible interfacing
- Glue gun and glue sticks
- Scissors
- Ribbon
- Ruler
- Wonder sewing clips or pins
Tools
- glue gun
- scissors
Instructions
- Print 2 copies of your felt crown template and tape them together. Measure around your child’s head and subtract 1”. This is the length you want the template for your crown. Cut your template to the size you need.
- Cut your two pieces of felt and two pieces of interfacing to the height and width of your finished template size. Iron the interfacing onto your felt.
- Lay one template onto one piece of felt, felt side up, and clip or pin into place. And cut. Now flip the felt crown template to the other side and place it on the other piece of felt, felt side up, and clip or pin into place. And cut.
- Using your hot glue gun, line up your two felt crown pieces, interfacing sides together, and secure together with glue. Leave a small opening in the middle on either side for the ribbon.
- Cut two lengths of ribbon for the ties. The length will depend on how long you and your child would like it to be. Glue the ribbon on the sides of the crown, in between the layers, where you left the small opening. Be sure you close the opening and the ribbon is nice and secure, so it does not pull out when tied.
- Using a small glass as a guide, draw a circle on your felt, and cut with your craft scissors. Pick up the felt and pinch from behind with your fingers.
- Using your glue gun, put a small drop of glue in the middle of the felt and hold for a few seconds. Using your glue gun, glue a small rhinestone in the middle.
- Finally, using your glue gun, decorate your felt fairy crown!

Ellen is a mom of a 25-year-old son and 30-year-old daughter. She is Grandma to one adorable toddler. In what little spare time she has, she loves to read, watch movies, and check out the latest toys and games.