Last Updated on April 9, 2022 by ellen
Check out this dream catcher kids craft that you and the kids can do this weekend! Encourage creativity with this simple crochet kids craft.
Posts may be sponsored. This post contains affiliate links, which means I will make a commission at no extra cost to you should you click through and make a purchase. As an Amazon Associate I earn from qualifying purchases.
I always had a bucket of craft materials for the kids to use. Getting crafty is a great way to encourage creative thinking and independent play. So, keep reading for the directions because you’ll want to make a few of these.

Table of Contents
Dream Catcher Kids Craft
Now, if you know how to crochet, you can make the little doily for the center yourself. But, if you are completely clueless when it comes to crochet (like me), you can buy a small ready-made crochet doily that will work just fine.
If you want to learn more about how to crochet, you can take this simple class and learn corner to corner crochet. I just love this style!
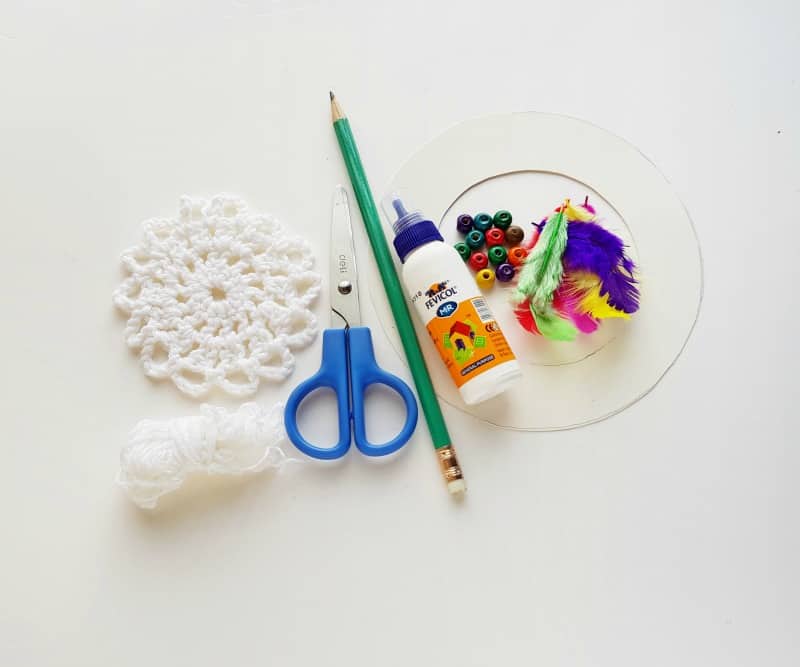
Dream catcher kids craft supplies:
Crochet doily
Yarn
Round dreamcatcher base (from cardstock paper)
Pencil
Scissors
Craft feathers
Wooden beads
Craft glue
Instructions:
Step 1:
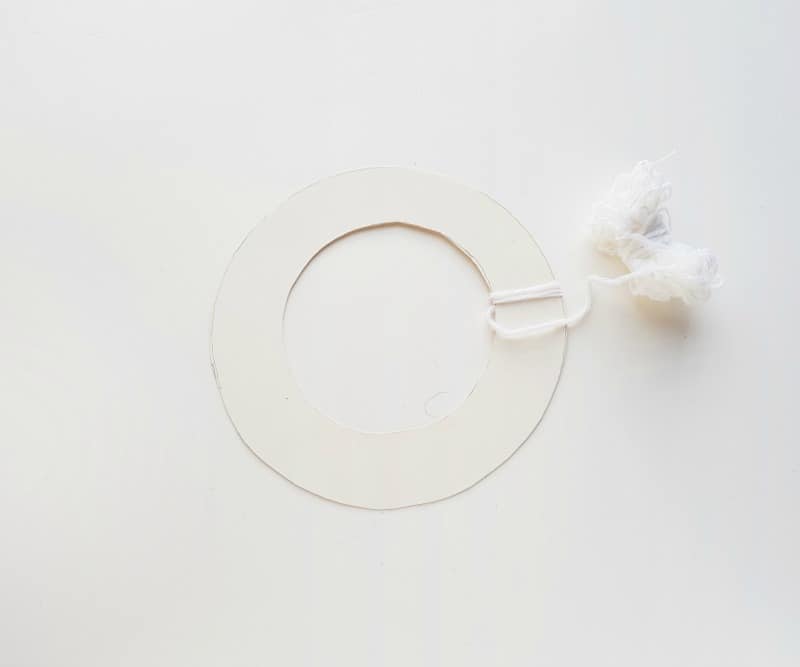
Prepare the dreamcatcher base and grab a bundle of yarn (any color of your choice). Apply a drop of glue at the open end of the yarn and attach it with the base.
Start to wrap the yarn around the base.
Step 2:
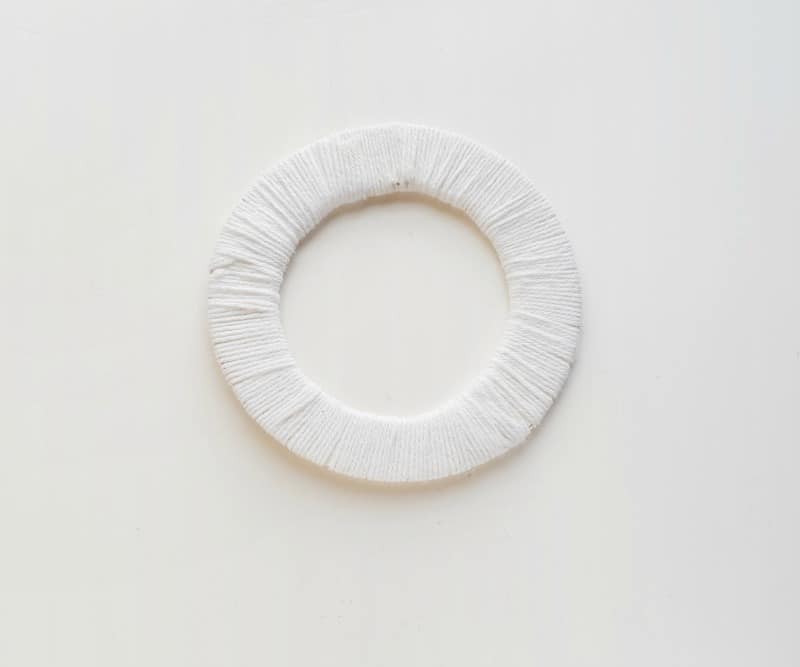
Continue to wrap the yarn around the base until the whole base is covered. Once the wrapping reaches the end, tie a knot, apply a drop of glue on the knot and cut off the extra yarn.
Make sure to tie the knot on the back side of the base. This will be the base structure for your dream catcher kids craft so be sure it is sturdy.
Step 3:
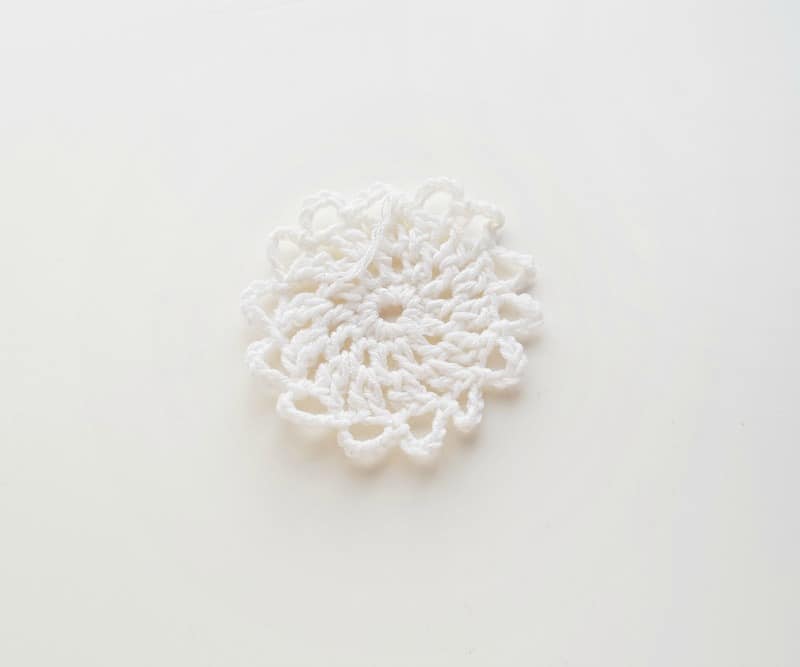
Crochet a doily to a size so that it fits perfectly inside the yarn wrapped base.
You can use a pre-made doily for this dream catcher kids craft if you cannot crochet because I know not everyone knows how.
Step 4:
Place the yarn wrapped base on a flat surface and then place the crochet doily inside the base.
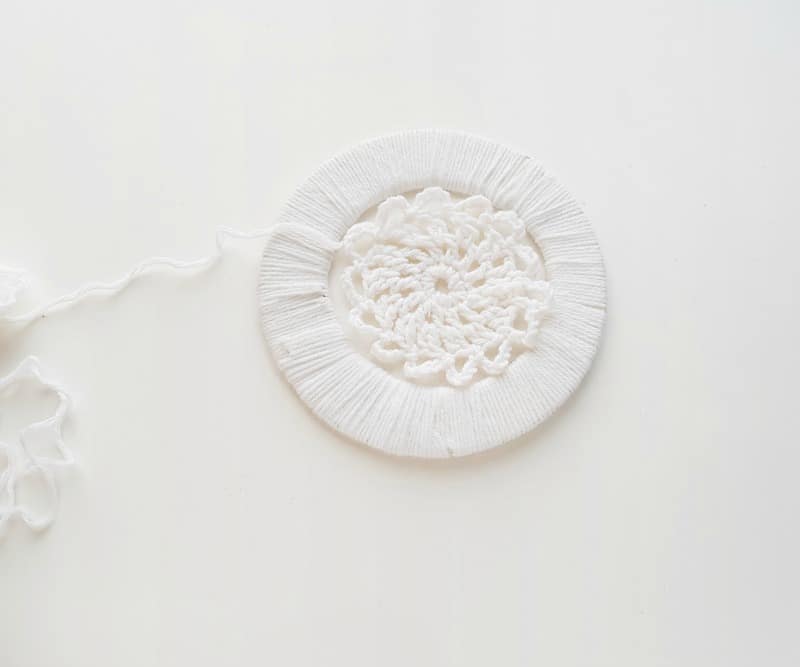
Grab the yarn bundle and attach the doily with the base by drawing the yarn through the crochet patterns along the outer border and then again wrapping it around the base.
Step 5:
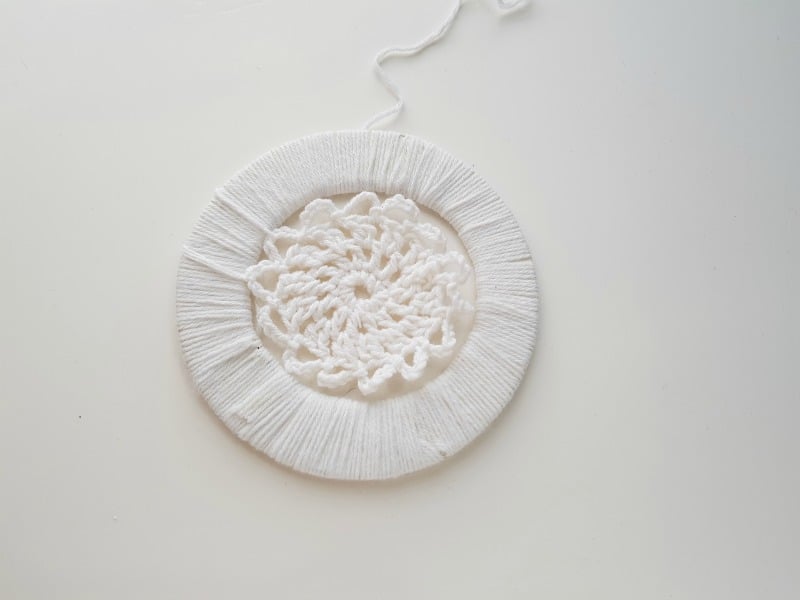
Continue to draw yarn through the doily and around the base until the whole crochet is covered. After reaching the end, tie a knot and cut off the extra yarn.
Step 6:
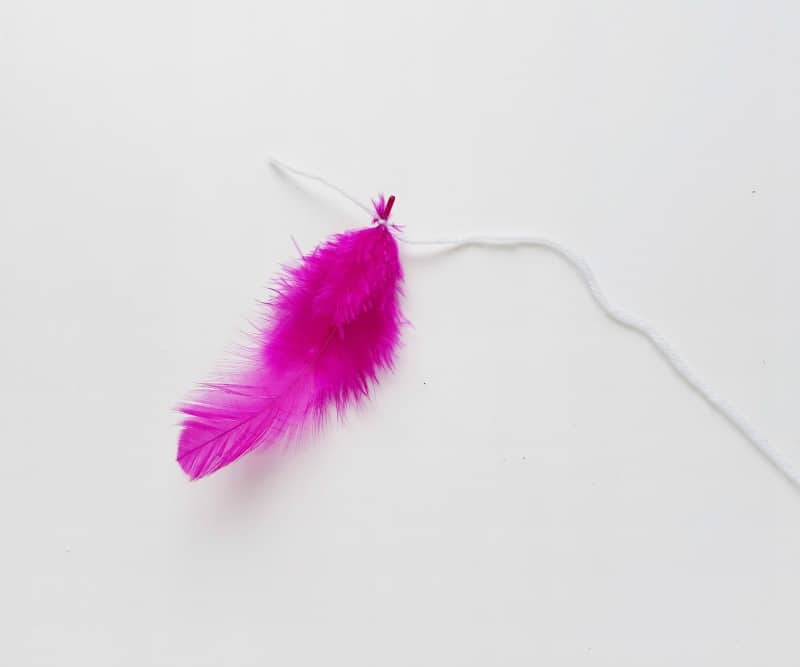
Take a colorful craft feather and the yarn bundle. Tie the yarn around the hollow shaft of the feather.
Make sure that the knot is tight and secure. Cut off yarn from the bundle by keeping enough length for the dreamcatcher hanging.
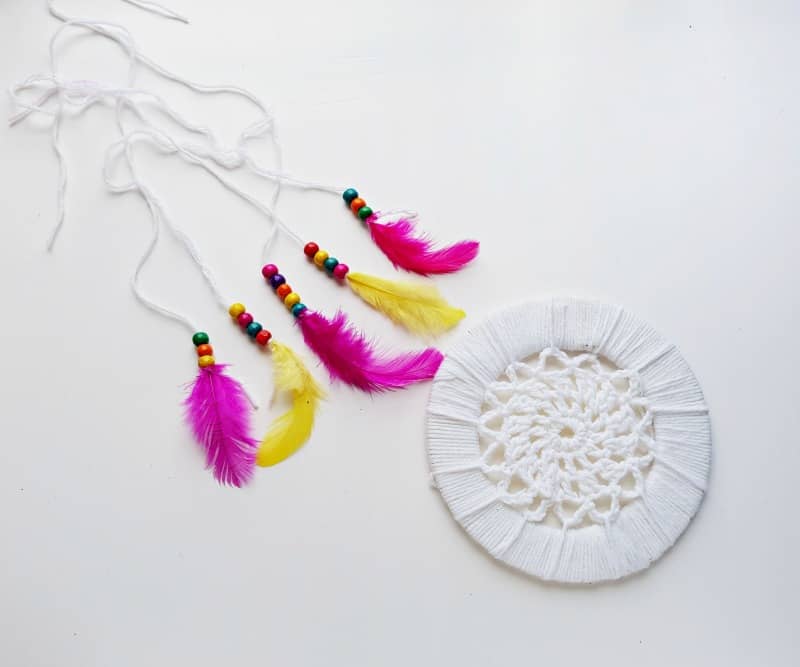
Make this dream catcher kids craft unique by adding a variety of different colored feathers and beads.
Step 7:
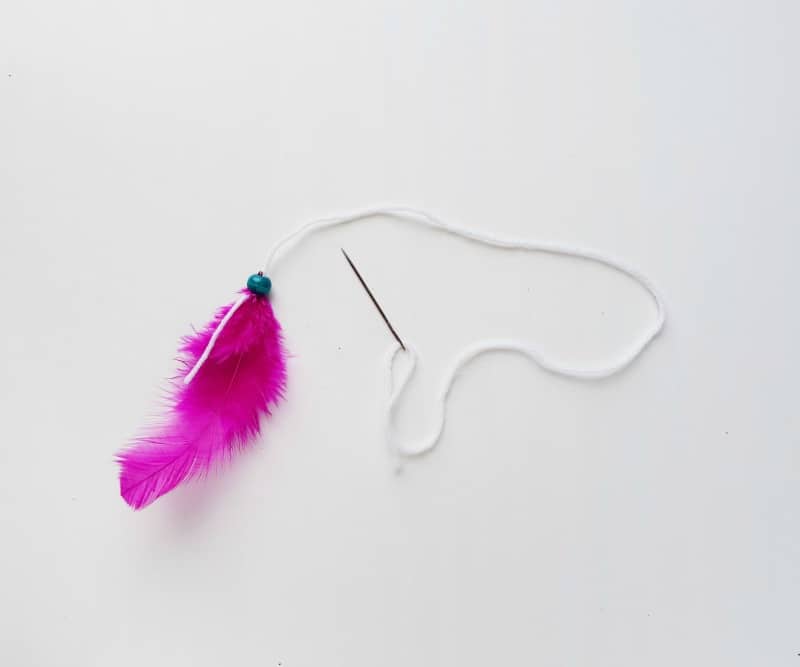
Take a wooden bead and thread the bead into the yarn (attached to the feather) through its open end. Push the bead all the way to the feather shaft because you’ll want to add more.
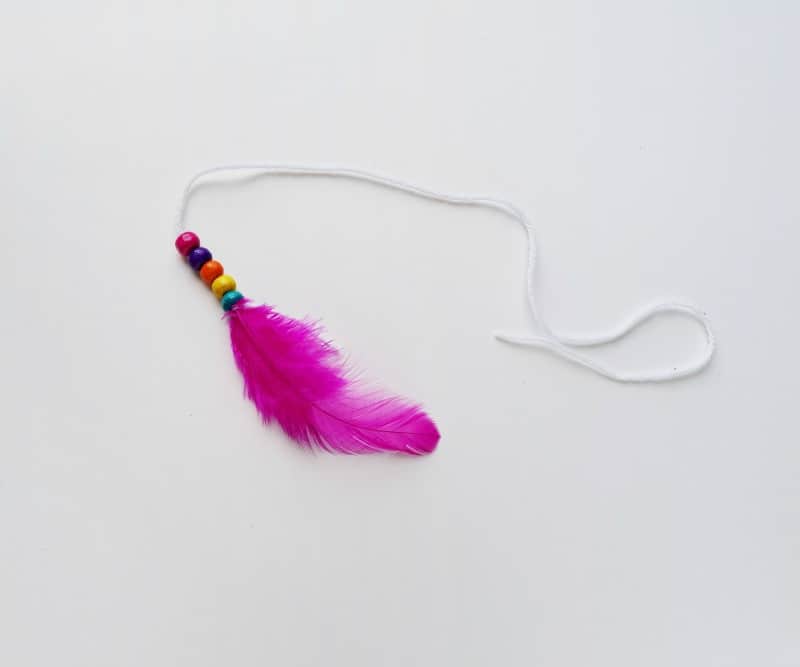
Step 8:
Thread more beads similarly. Add as many beads as you want.
Step 9:
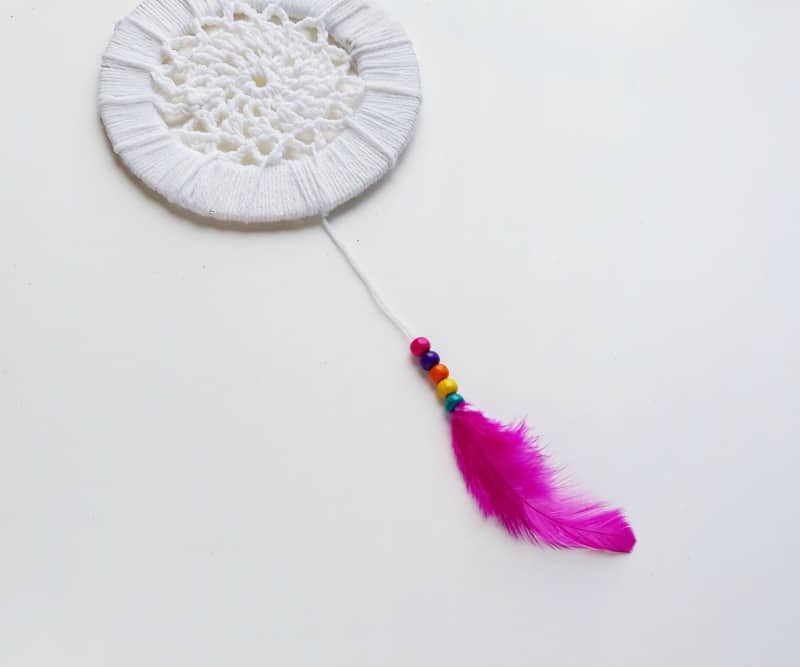
Attach the beaded feather attached yarn with the dreamcatcher base by tying its open end around the baseband.
Step 10
Finally, keep going and prepare more beaded feather yarns strands and attach them with the dreamcatcher base until you are satisfied with the pattern.
So, that’s all there is for this cute Dream Catcher kids craft. You should be able to find most of these craft items at home. But, if you can’t, I have linked to a few of the supplies on Amazon.
Finally, love kids’ crafts? Check out these fabric yo-yos because they’re lots of fun to make.
If you want to learn more about how to crochet, you can take this simple class and learn corner to corner crochet. I just love this style!
Dream Catcher Kids Craft
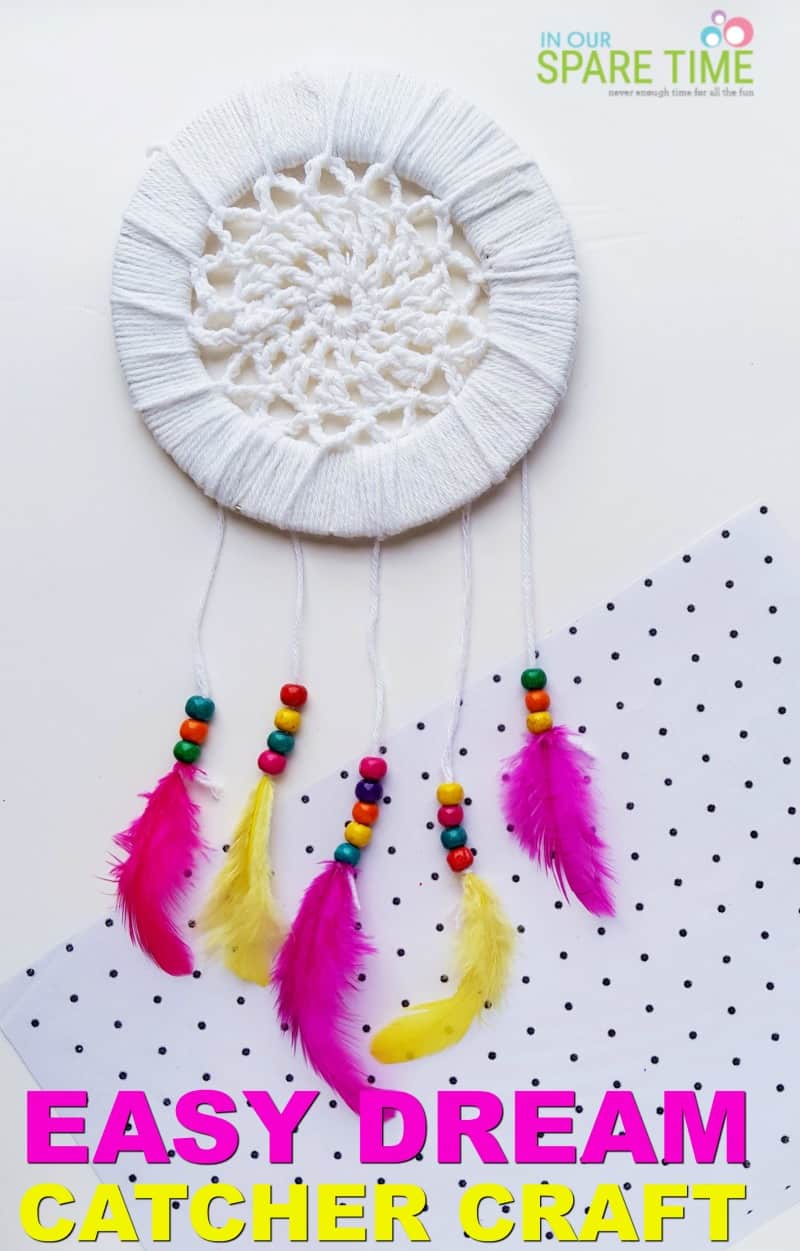
Check out this dream catcher kids craft that you and the kids can do this weekend! Encourage creativity with this simple crochet kids craft.
Materials
- Crochet doily
- Yarn
- Round dreamcatcher base (from cardstock paper)
- Pencil
- Scissors
- Craft feathers
- Wooden beads
- Craft glue
Tools
- scissors
Instructions
- Prepare the dreamcatcher base and grab a bundle of yarn (any color of your choice). Apply a drop of glue at the open end of the yarn and attach it with the base. Start to wrap the yarn around the base.
- Continue to wrap the yarn around the base until the whole base is covered. Once the wrapping reaches the end, tie a knot, apply a drop of glue on the knot and cut off the extra yarn. Make sure to tie the knot on the back side of the base. This will be the base structure for your dream catcher kids craft so be sure it is sturdy.
- Crochet a doily to a size so that it fits perfectly inside the yarn wrapped base. You can use a pre-made doily for this dream catcher kids craft if you cannot crochet because I know not everyone knows how.
- Place the yarn wrapped base on a flat surface and then place the crochet doily inside the base. Grab the yarn bundle and attach the doily with the base by drawing the yarn through the crochet patterns along the outer border and then again wrapping it around the base.
- Continue to draw yarn through the doily and around the base until the whole crochet is covered. After reaching the end, tie a knot and cut off the extra yarn.
- Take a colorful craft feather and the yarn bundle. Tie the yarn around the hollow shaft of the feather. Make sure that the knot is tight and secure. Cut off yarn from the bundle by keeping enough length for the dreamcatcher hanging. Make this dream catcher kids craft unique by adding a variety of different colored feathers and beads.
- Take a wooden bead and thread the bead into the yarn (attached to the feather) through its open end. Push the bead all the way to the feather shaft because you’ll want to add more.
- Thread more beads similarly. Add as many beads as you want.
- Attach the beaded feather attached yarn with the dreamcatcher base by tying its open end around the baseband.
- reamFinally, keep going and prepare more beaded feather yarns strands and attach them with the dreamcatcher base until you are satisfied with the pattern.

Welcome to In Our Spare Time, your go-to source for family-friendly fun. Discover honest reviews, entertaining articles, and fresh ideas for making the most of your free time with younger kids. From games, movies, and books to family activities and seasonal adventures, we help parents find simple ways to create memorable moments together.