Last Updated on December 11, 2023 by ellen
Are you looking for toddler activity ideas? Check out this fun craft that uses plastic pony beads to make a suncatcher. Make one today.
Posts may be sponsored. This post contains affiliate links, which means I will make a commission at no extra cost to you should you click through and make a purchase. As an Amazon Associate I earn from qualifying purchases.
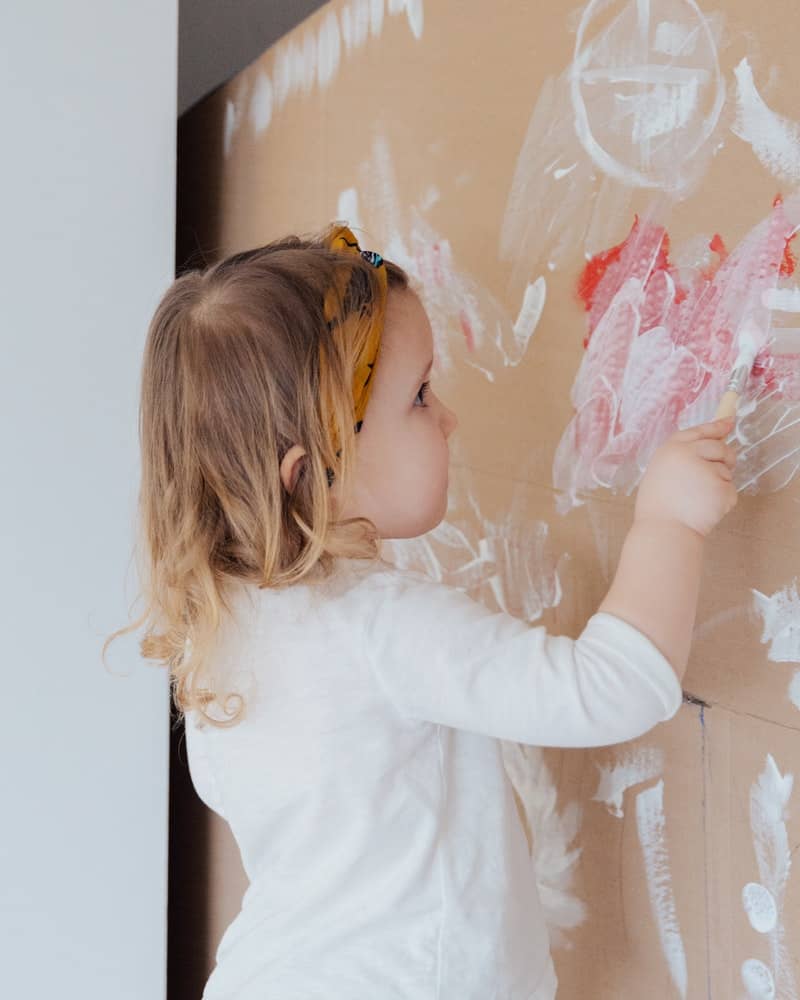
Keeping kids busy on a snow day (or any day really) can definitely be a bit of a challenge. But, there are always fun crafts for kids to keep them entertained.
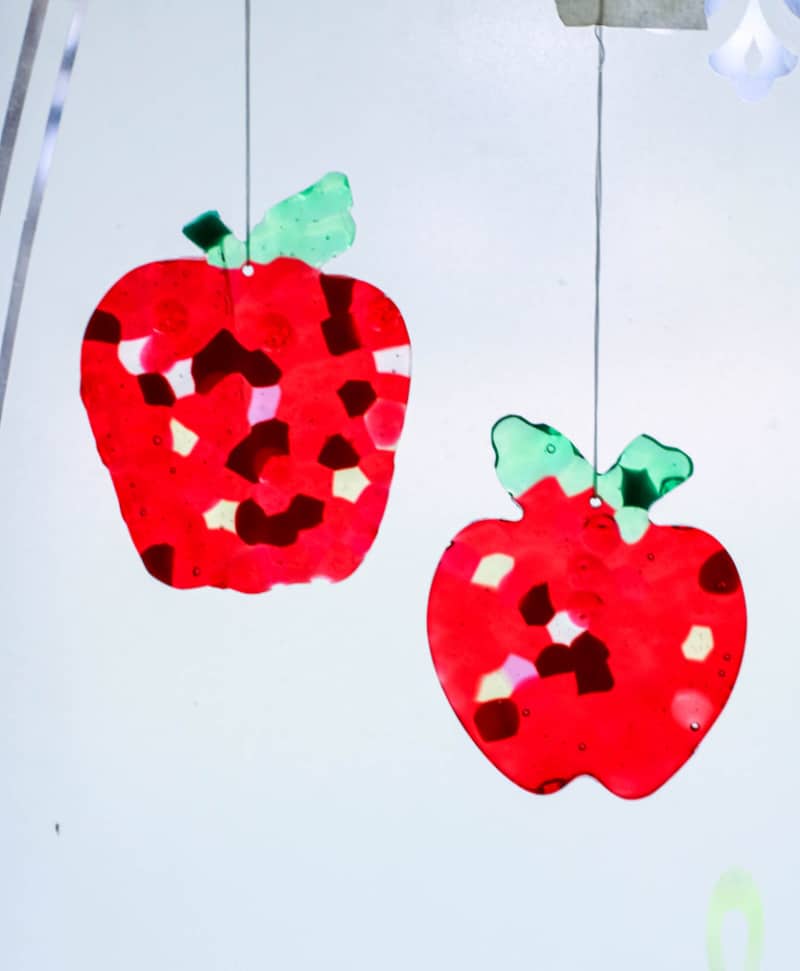
Table of Contents
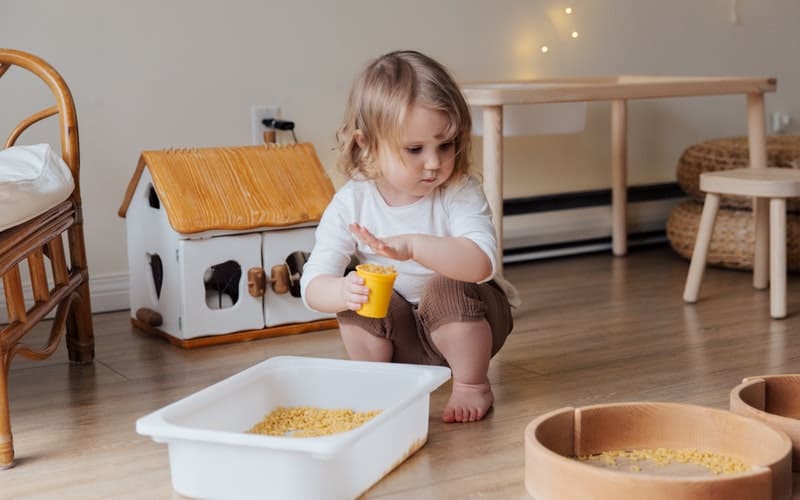
Toddler Activity Ideas
There are lots of easy toddler activities to keep the kids busy. I don’t have time to run to the store for special supplies or put together complicated things for the kids to play with.
I really like supplies that use things I already have on hand and can be prepared in just a few minutes. And, of course, I want activities that the kids will really love.
Here are a few things that we keep in our activity box for days when the kids want something new to do.
- A box of dry pasta
- Pony beads
- Stickers
- Legos
- Water toys
- Wooden blocks
- Sensory bottle
What activities do toddlers enjoy?
- Felt board
- Finger paint
- Slime
- Shaving cream
- Bath paints
What are good activities for 2-year-olds?
Here are a few toddler activity ideas for your two year old.
- Simon says
- Dress up
- Hide and seek with toys
- Sorting games
Pony Bead toddler activity idea
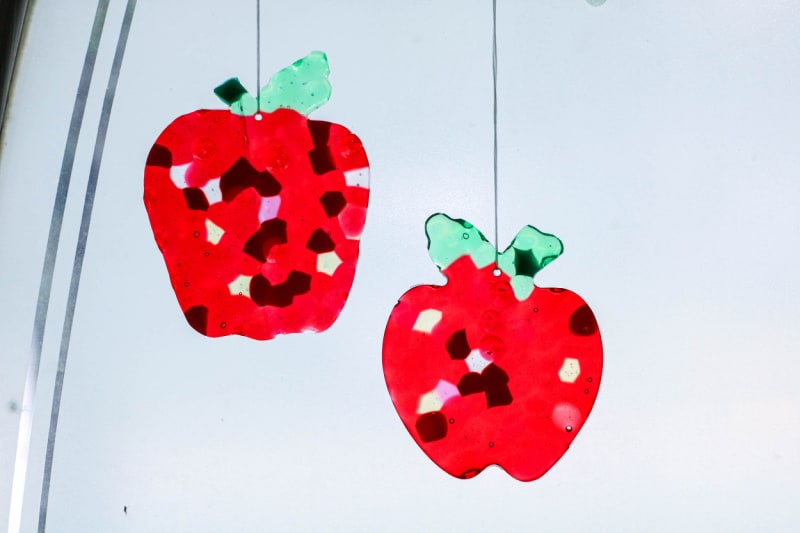
There are lots of educational activities for toddlers you can do. But, this pony bead suncatcher is one of my favorites for helping your child identify colors.
If you have Perler beads, try this DIY bubble wand for kids to make. Blowing bubbles is always fun for children.
What you need to make this suncatcher
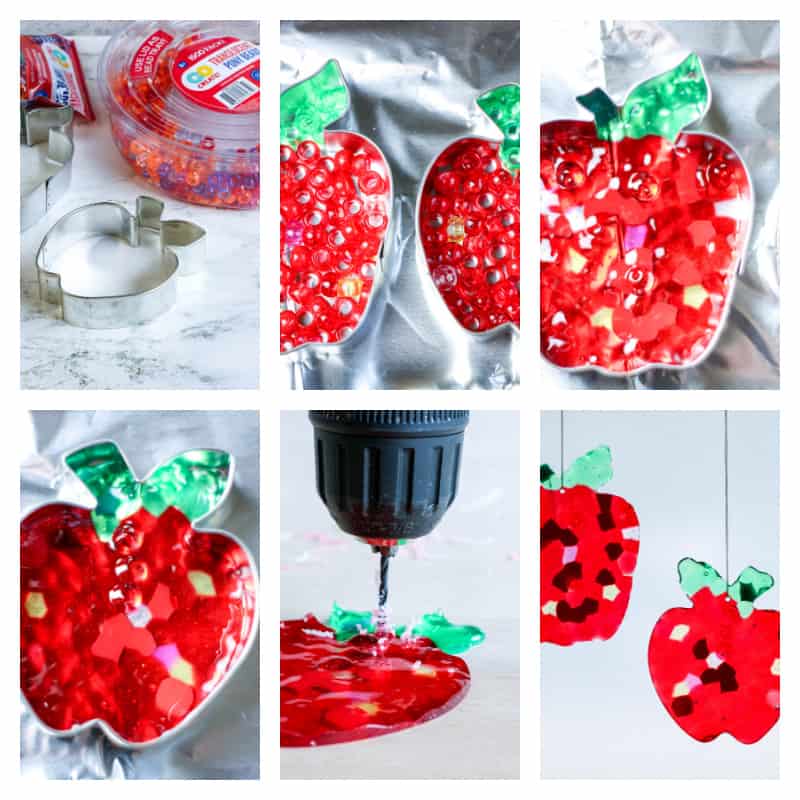
- Metal cookie or clay cutters
- Baking pan
- Aluminum foil
- Drill fitted with â…› inch drill bit, optional
 Directions
- Preheat oven to 400 degrees.
- Line baking pan with aluminum foil to protect the pan and make it easier for the ornaments to release from the pan.
- Place cookie cutters on aluminum foil in a baking pan. Fill each ornament with a single layer of beads. Use a toothpick or bamboo skewer to arrange the beads.
- Carefully put the baking sheet in the oven and melt the beads. The time can vary based on the type of bead. Begin checking at 5 minutes. (My ornaments took 15 minutes to melt.) The ornaments are ready when the beads are melted and the hole in each bead has disappeared.
- Remove from oven and allow to cool completely prior to removing from the cookie cutters. To remove the ornaments, gently pull the sides of the cookie-cutter away from the ornament.
- If desired, use the drill to create a small hole in each ornament for hanging.
More toddler activity ideas with pony beads
Related reading
Looking for something new to do?
- Why not learn more about salt painting?
- Try these rock painting designs.
- Shaving foam painting
- Christmas Valentine Cards
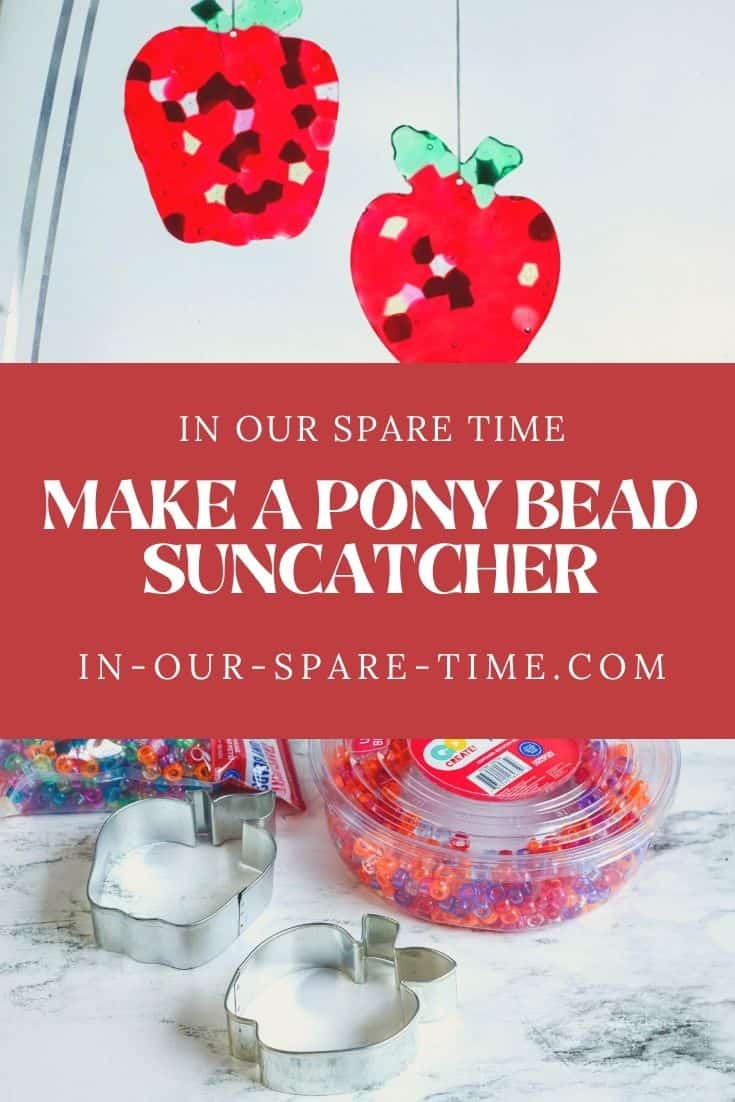
Pony Bead Suncatcher
Are you looking for toddler activity ideas? Check out this fun craft that uses plastic pony beads to make a suncatcher. Make one today.
Materials
- Plastic pony beads
- Metal cookie or clay cutters
- Baking pan
- Aluminum foil
- Drill fitted with ⅛ inch drill bit, optional
Tools
- drill (optional)
Instructions
- Preheat oven to 400 degrees.
- Line baking pan with aluminum foil to protect the pan and make it easier for the ornaments to release from the pan.
- Place cookie cutters on aluminum foil in a baking pan. Fill each ornament with a single layer of beads. Use a toothpick or bamboo skewer to arrange the beads.
- Carefully put the baking sheet in the oven and melt the beads. The time can vary based on the type of bead. Begin checking at 5 minutes. (My ornaments took 15 minutes to melt.) The ornaments are ready when the beads are melted and the hole in each bead has disappeared.
- Remove from oven and allow to cool completely prior to removing from the cookie cutters. To remove the ornaments, gently pull the sides of the cookie-cutter away from the ornament.
- If desired, use the drill to create a small hole in each ornament for hanging.

Welcome to In Our Spare Time, your go-to source for family-friendly fun. Discover honest reviews, entertaining articles, and fresh ideas for making the most of your free time with younger kids. From games, movies, and books to family activities and seasonal adventures, we help parents find simple ways to create memorable moments together.