Last Updated on May 28, 2023 by ellen
Check out these resources for decoupage for kids. Try this easy kids decoupage project and create a decoupage flower pot with your child.
Posts may be sponsored. This post contains affiliate links, which means I will make a commission at no extra cost to you should you click through and make a purchase. As an Amazon Associate I earn from qualifying purchases.
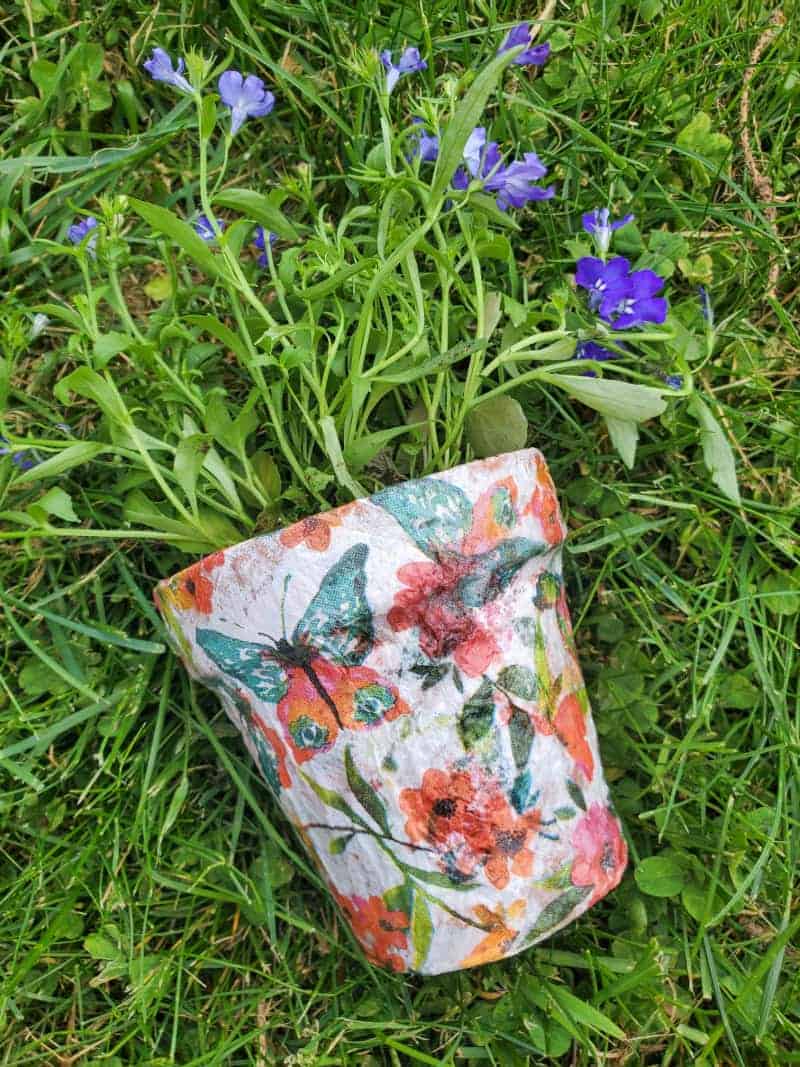
Table of Contents
Decoupage for Kids
I love decoupage because it’s a wonderful way to repurpose and upcycle things that I already have around the house.
I originally learned how to decoupage when I wanted to do a bit of egg decorating but didn’t want to dye them. Now, it’s become one of my favorite crafts.
Decoupage is one of those crafts that’s really easy enough for anyone to do. It’s quite forgiving if you make a mistake which means that it’s great for children.
Even though this is a great craft for kids, you will need to supervise younger children. You don’t want to leave them alone in the kitchen with a bottle of Mod Podge and a paintbrush.
You never know what you’ll come back to.
Can kids do decoupage?
Yes, even a younger child can make this type of craft project. There are very few craft materials needed and it’s a wonderful way for them to express their creativity. Plus, your child can finish the project in a relatively short time.
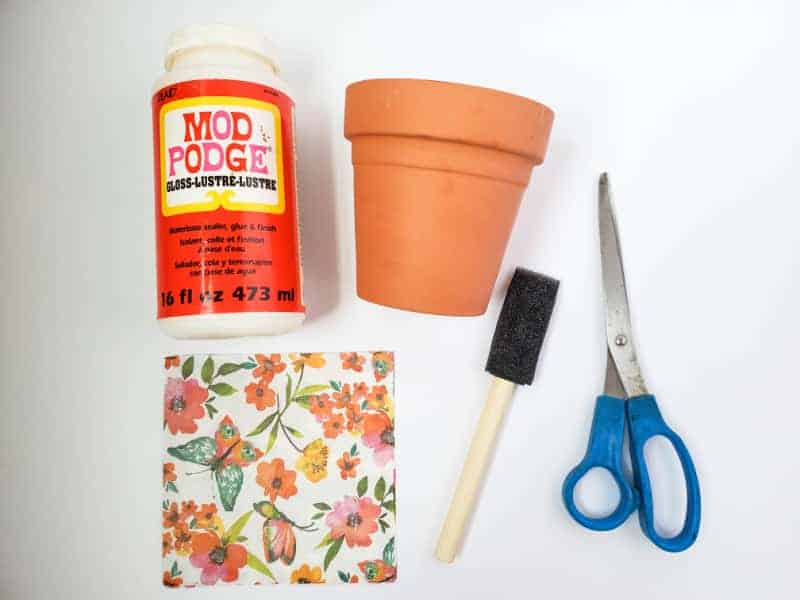
Materials for decoupage for kids
This project uses a flower pot as the base. But, you could easily use a wooden box, a slab of wood, or a coffee can. Or, why not decoupage a cardboard box?
You will also need:
- Mod Podge
- Paintbrush
- Decorative napkins
- Scissors
- Sealer (if used outside)
No products found.
What type of napkins are best for decoupage?
You can really use any type of paper napkin when you decoupage. But, I find that decorative napkins work best. So, look for napkins with flower patterns or another type of design. here are a few options.
What can I use for decoupage paper?
If you don’t have paper napkins, you can also use tissue paper. All you need is a few sheets of the type of tissue paper you use to wrap presents.
It can be plain or patterned. You may need to do more than one layer if it is too thin.
Which Mod Podge to use for decoupage for kids?
There are lots of different types of Mod Podge. I use the original version in the orange bottle. You can get it right here on Amazon.

Instructions:
- Using a foam brush, apply a layer of Mod Podge around the outside of the pot.
- Unfold the napkin, flip it upside down, and place the pot in the center of it.
- Cut a slit along the seam of the napkin, until the scissors meet the pot.
- Wrap one corner of the napkin up the pot, add some Mod Podge to the inside rim, then fold the napkin over into the rim. Repeat this step for all four corners of the napkin.
- Once the pot is covered in the napkin, apply a layer of Mod Podge around the entire outside of the pot, as well as the inside rim, and the outside of the bottom of the pot.
- Allow it to dry.
- You may need to do another coat of Mod Podge.

More crafts for kids
If you enjoyed this decoupage for kids project, why not try one of these.
- Rock painting flowers
- DIY Easter flower basket
- Dream catcher kid’s craft
- Cardboard box guitar
- Animal crafts for toddlers
- Wooden toys for toddlers
- Art toys for 6 year olds
- Easy rockpainting designs
- Flower pot painting for kids
- Bookmark to color
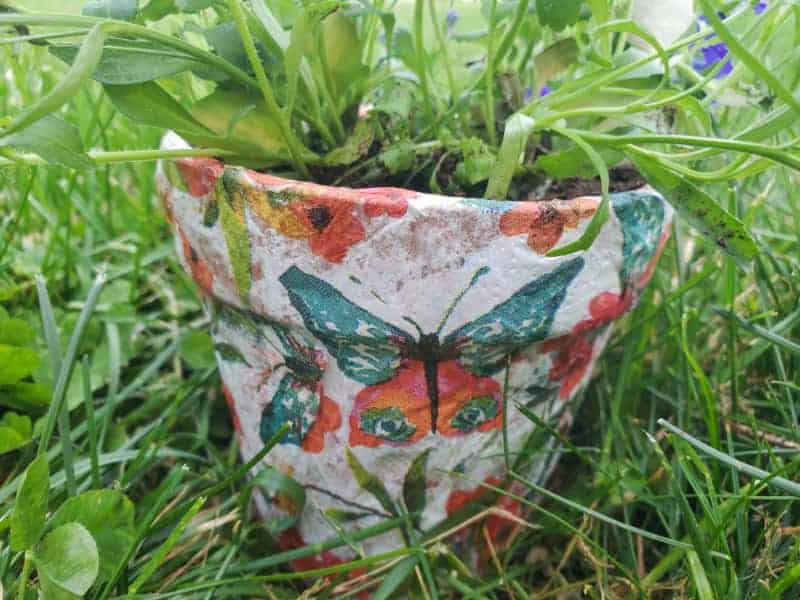
Decoupage Flower Pot for Kids
Check out these resources for decoupage for kids. Try this easy kids decoupage project and create a decoupage flower pot with your child.
Materials
- 3-4 inch diameter clay pot
- Decorative napkin (this one is from Dollar Tree)
- Mod Podge
- Foam brush
- Scissors
- Sealer (optional if using outside)**
Tools
- scissors
Instructions
- Using a foam brush, apply a layer of Mod Podge around the outside of the pot.
- Unfold the napkin, flip it upside down, and place the pot in the center of it.
- Cut a slit along the seam of the napkin, until the scissors meet the pot.
- Wrap one corner of the napkin up the pot, add some Mod Podge to the inside rim, then fold the napkin over into the rim. Repeat this step for all four corners of the napkin.
- Once the pot is covered in the napkin, apply a layer of Mod Podge around the entire outside of the pot, as well as the inside rim, and the outside of the bottom of the pot.
- Allow it to dry.
- You may need to do another coat of Mod Podge.
Notes
**If you plan to use the pot outside, you may want to seal it with something like Krylon Sealer Clear Finish Spray.

Welcome to In Our Spare Time, your go-to source for family-friendly fun. Discover honest reviews, entertaining articles, and fresh ideas for making the most of your free time with younger kids. From games, movies, and books to family activities and seasonal adventures, we help parents find simple ways to create memorable moments together.